1. Overview
brückeMind is a mind map editor. It consists only of HTML, CSS and JavaScript files and runs completely in the browser. It does not need a server and never loads content, files or data from the internet. Mind maps are stored in the browser and can be exchanged as files.
The design follows the colors of Brücke Rendsburg-Eckernförde e.V.: the primary blue
#164194 and the other colours of its colour concept.
2. Installation
- Copy the application folder to your computer (download it or clone the repository).
- Open
index.htmlwith a double-click.
A current version of Firefox, Chrome, Edge or Safari is required. There is no build step and no dependency. The folder can also be placed on a network share, a USB stick or a web server.
index.html needs the folders
css, js and templates next to it.3. The user interface
| Area | Purpose |
|---|---|
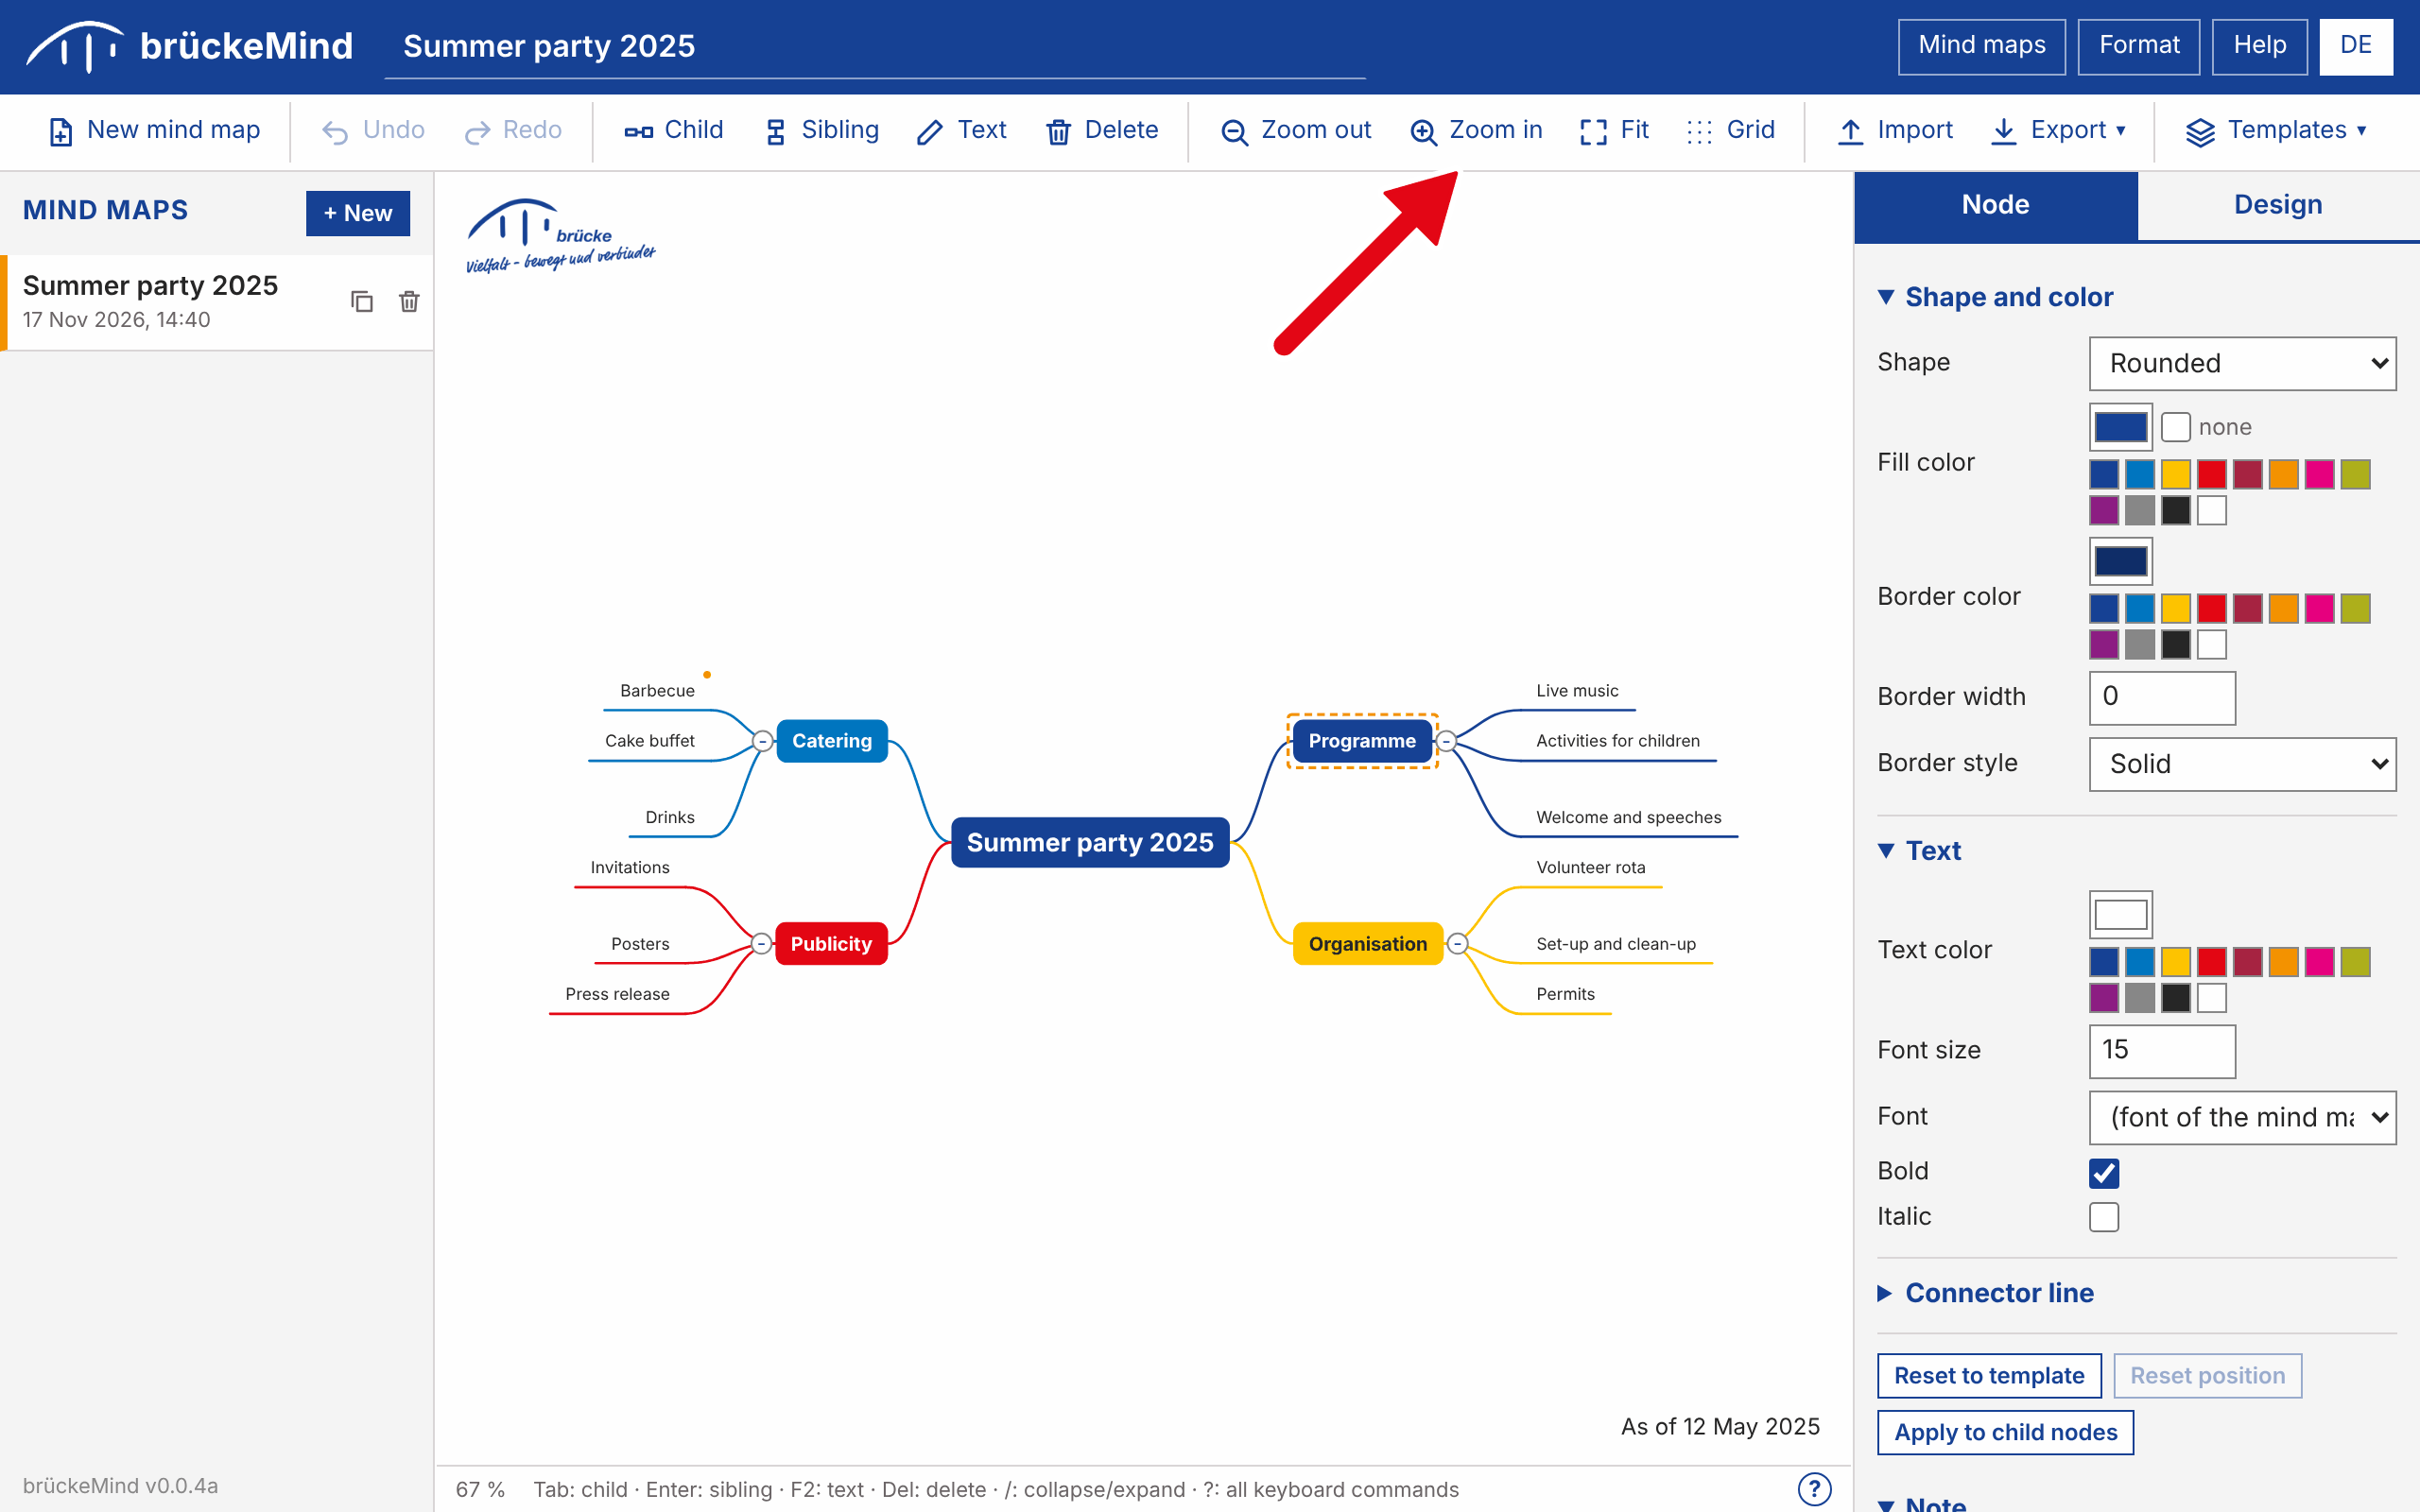
| Header | Title of the open mind map (click to rename), buttons to show or hide the mind map list and the format panel, Help (opens this documentation) and the language switch (German / English). |
| Toolbar | New mind map, undo/redo, node commands, zoom, import, export and templates. |
| Mind map list (left) | All stored mind maps, newest first. Click to open, or use the icons to duplicate or delete a mind map. The version of the application is shown at the bottom of the list. |
| Canvas (center) | The mind map. Fixed elements of the template, such as a logo, stay in place while you pan and zoom. |
| Panel (right) | The Node tab styles the selected node, the Design tab styles the whole mind map. |
The width of the left and the right column can be changed by dragging the border between the column and the canvas. A double-click on the border restores the default width. The widths are remembered.
In many places of the application a small link More in the documentation opens the matching section of this documentation: on both tabs of the panel, in the template manager, in the PDF and print dialog and in the overview of the keyboard commands.
4. Working with mind maps
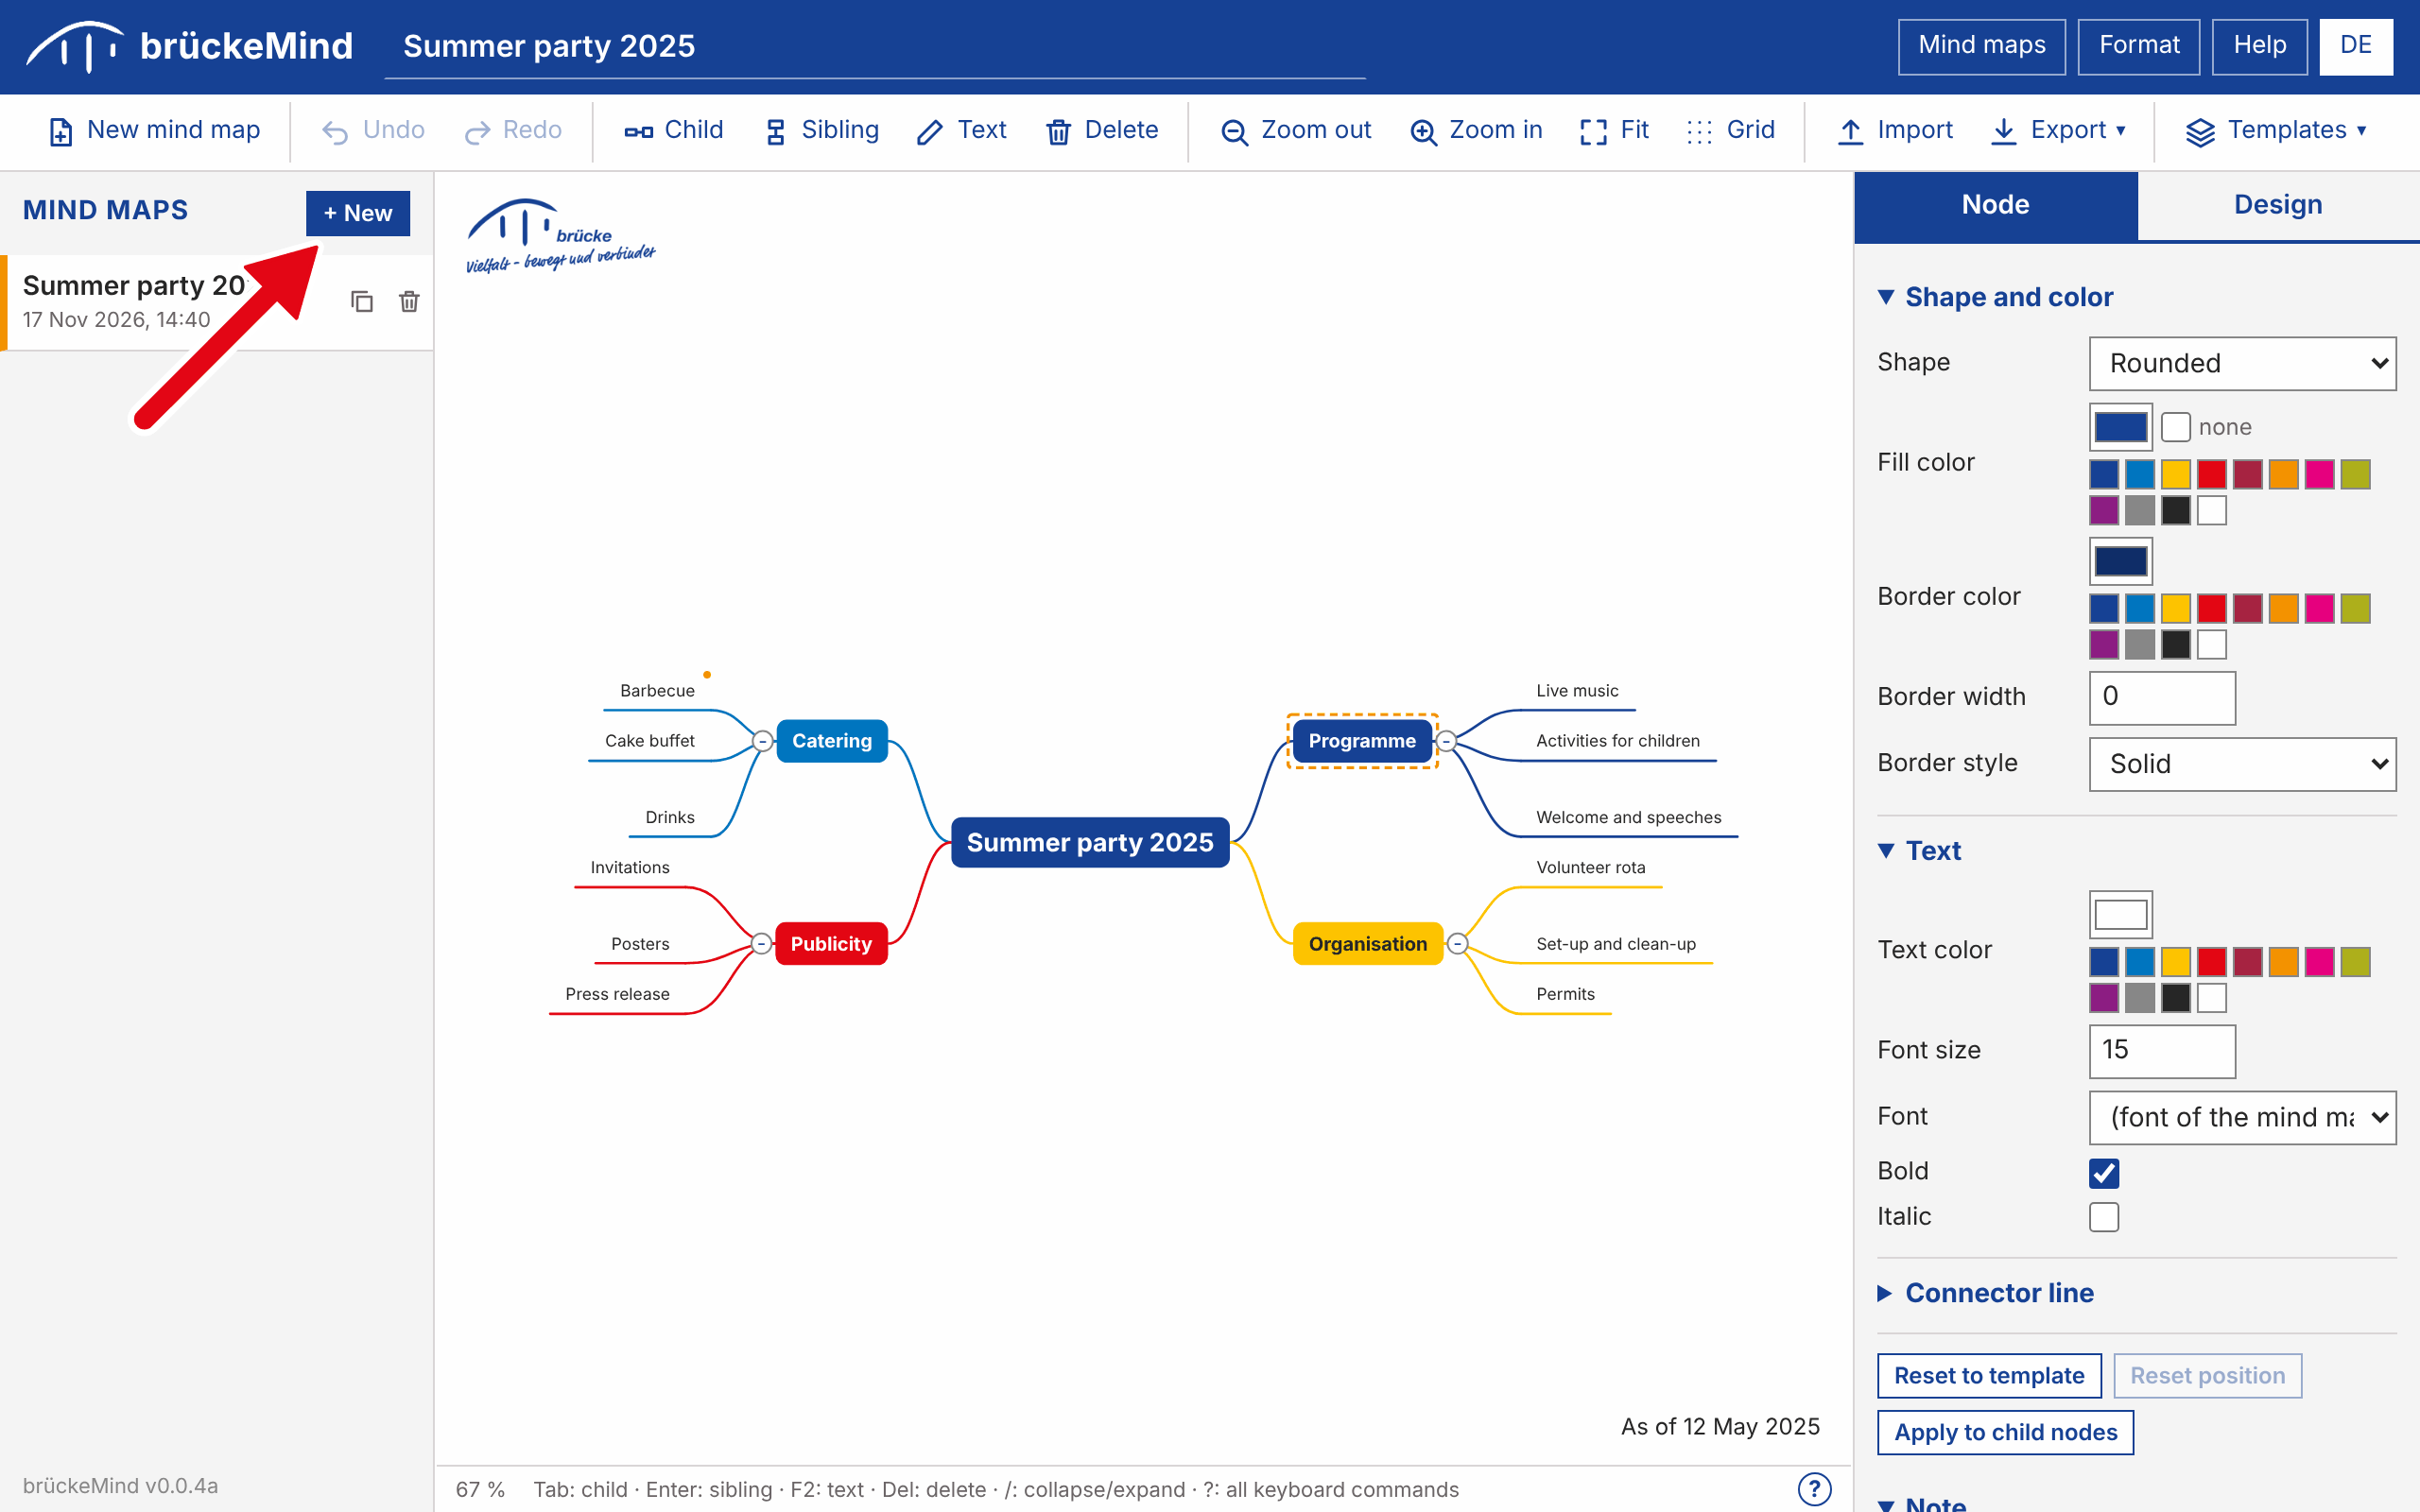
- Create: choose New mind map and enter a title. The new mind map uses the default template.
- Rename: change the title in the header and press Enter.
- Open, duplicate, delete: use the list on the left. Deleting cannot be undone.
- Save: every change is saved automatically in the browser.
5. Editing nodes
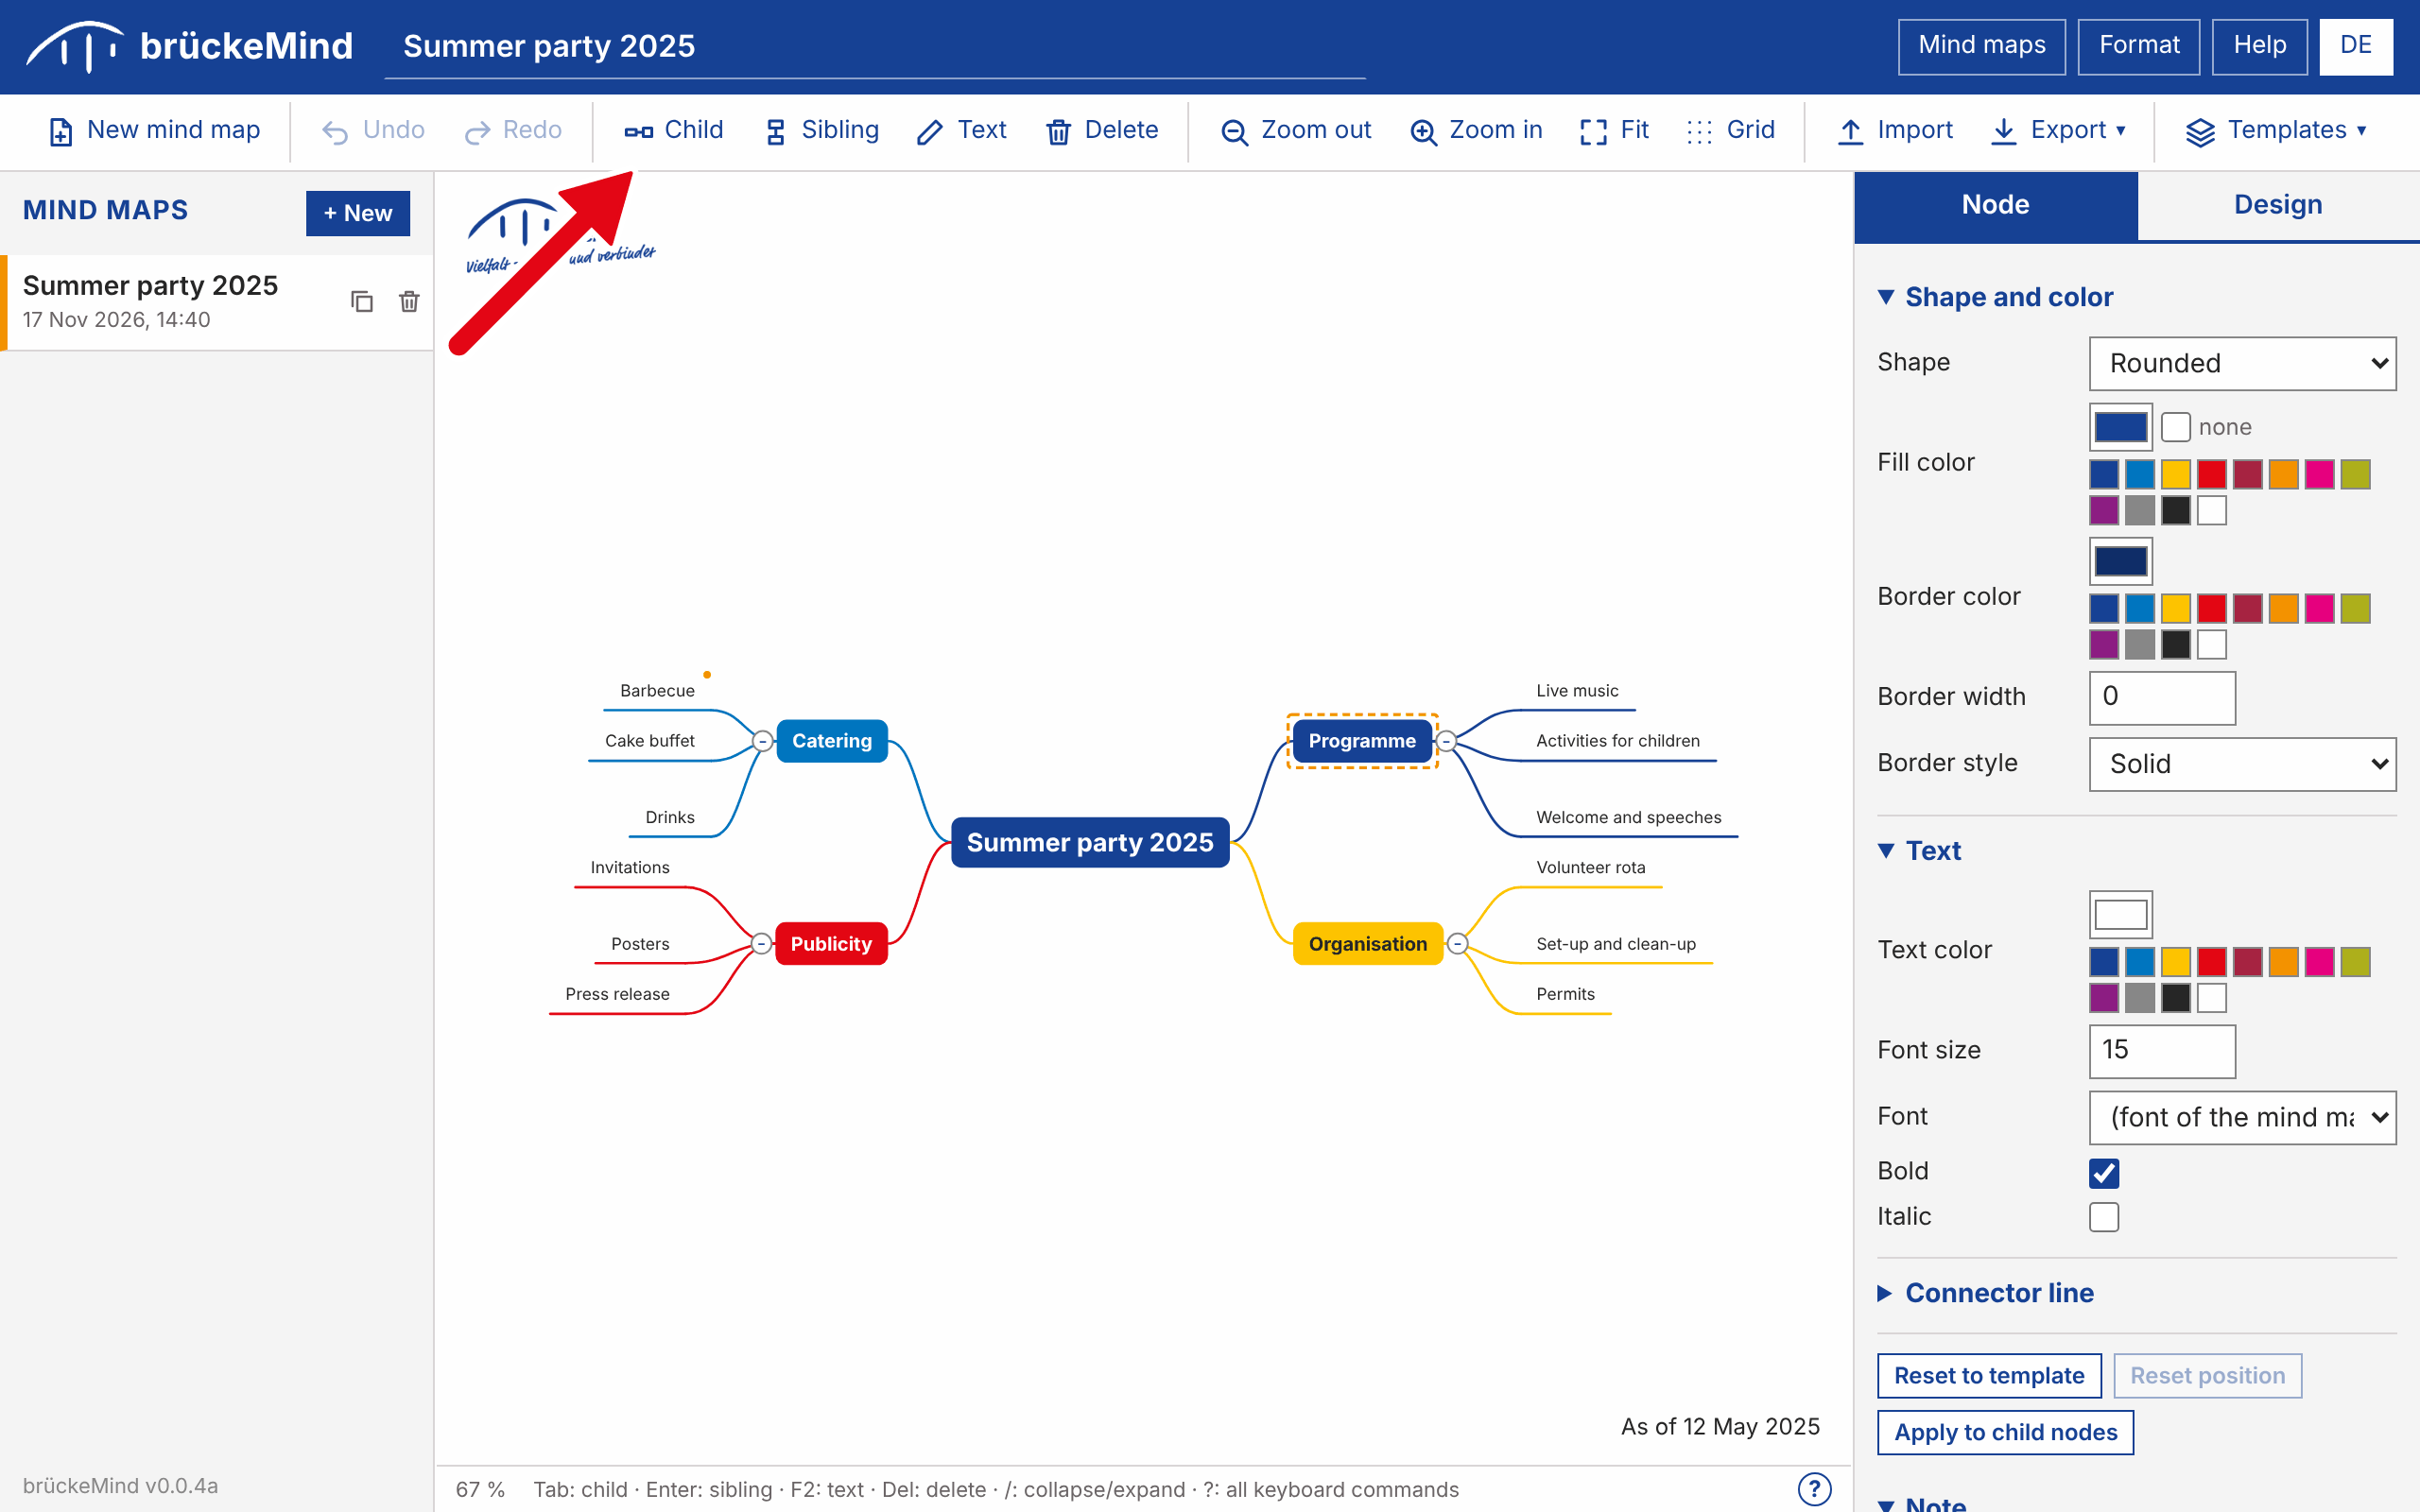
A mind map has one central node. Its children are the main branches, which are placed to the left and right. Everything is arranged automatically.
- Select a node by clicking it.
- Add a child with Tab or a sibling with Enter, then type the text and confirm with Enter.
- Edit text with a double-click, F2 or Space. Shift+Enter inserts a line break, Esc discards the change.
- Move a node by dragging it onto another node; it becomes a child of that node. Dropping it on a free place puts it there, see Placing nodes freely and the grid below.
- Collapse or expand a branch with the small circle next to a node or with /. A collapsed node shows the number of hidden nodes.
- Notes: the Node tab has a note field. Nodes with a note show an orange dot.
- Pan and zoom: drag the empty canvas to pan and use the mouse wheel to zoom.
Placing nodes freely and the grid
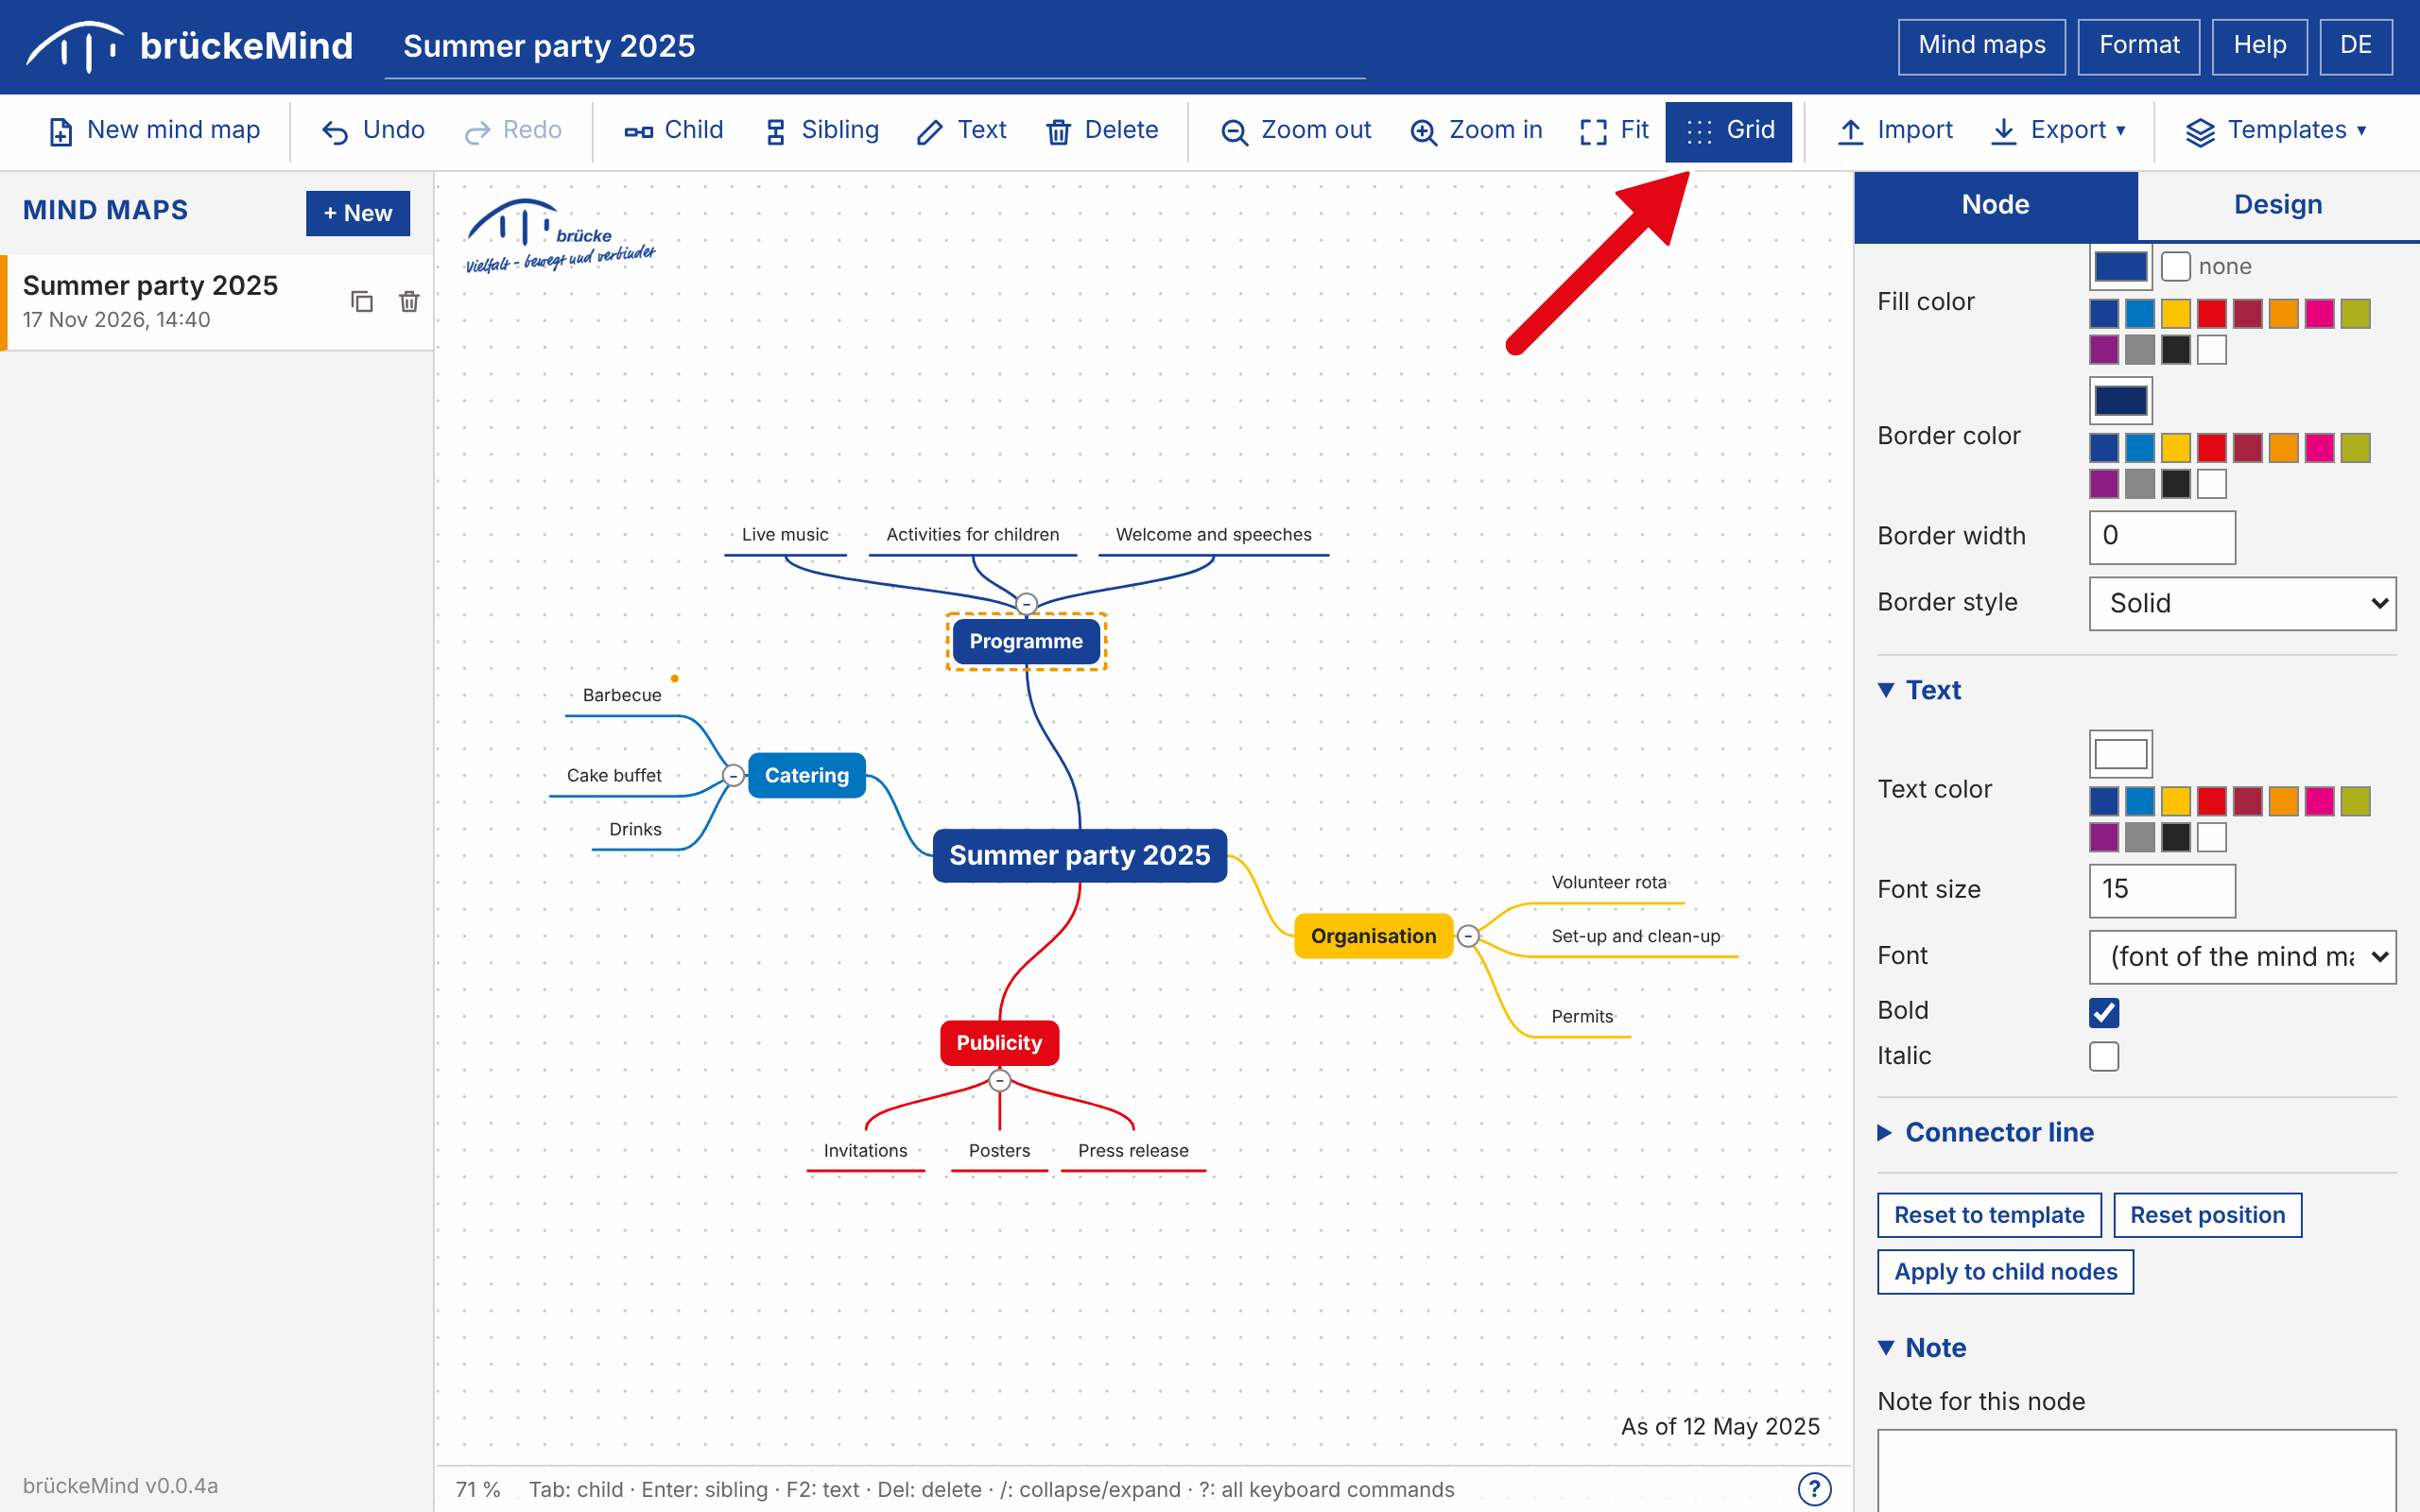
Every node sits on a point of an invisible grid. Grid in the toolbar or the key G shows or hides the lightly dotted grid in the background; this only changes what you see, nodes never move when the grid is shown or hidden.
- Placing: drag a node to a free place. It moves there together with its whole branch and snaps to the nearest grid point. Dropping it onto another node still makes it a child of that node.
- Shortest connection: the connector of a moved node attaches to the left or right edge of its parent when the node sits beside it and to the top or bottom edge when the node sits above or below it.
- Growth direction: the place of a moved node also decides where its own children go. A node placed below its parent gets its children in a row below it, a node placed above its parent gets them in a row above it, and a node placed beside its parent gets them at its outer side. New child nodes and their children continue in the same direction.
- Main branches: a main branch that is placed on the other side of the central node switches to that side.
- Kept and exported: the positions stay when the text or the structure changes, and
they are saved with the mind map and in
layout.xml.
Reset position on the Node tab returns the selected node to its automatic position and direction, Reset all positions on the Design tab does so for the whole mind map. The grid spacing and the dot color can be changed on the Design tab under Grid. The order of nodes among their siblings is changed with Alt+Up / Down. The grid dots are not part of image, PDF or print output.
6. Keyboard shortcuts
| Key | Action |
|---|---|
| Tab / Insert | Add a child node |
| Enter | Add a sibling node |
| F2 / Space | Edit the text of the selected node |
| Del / Backspace | Delete the selected node and its children |
| Arrow keys | Move the selection to the nearest node in that direction |
| Alt+Up / Down | Move the node among its siblings |
| / | Collapse or expand the selected branch |
| Ctrl+C / X / V | Copy, cut and paste a branch |
| Ctrl+Z / Ctrl+Y | Undo / redo |
| + / - / 0 | Zoom in / zoom out / fit the map into the window |
| G | Show or hide the grid |
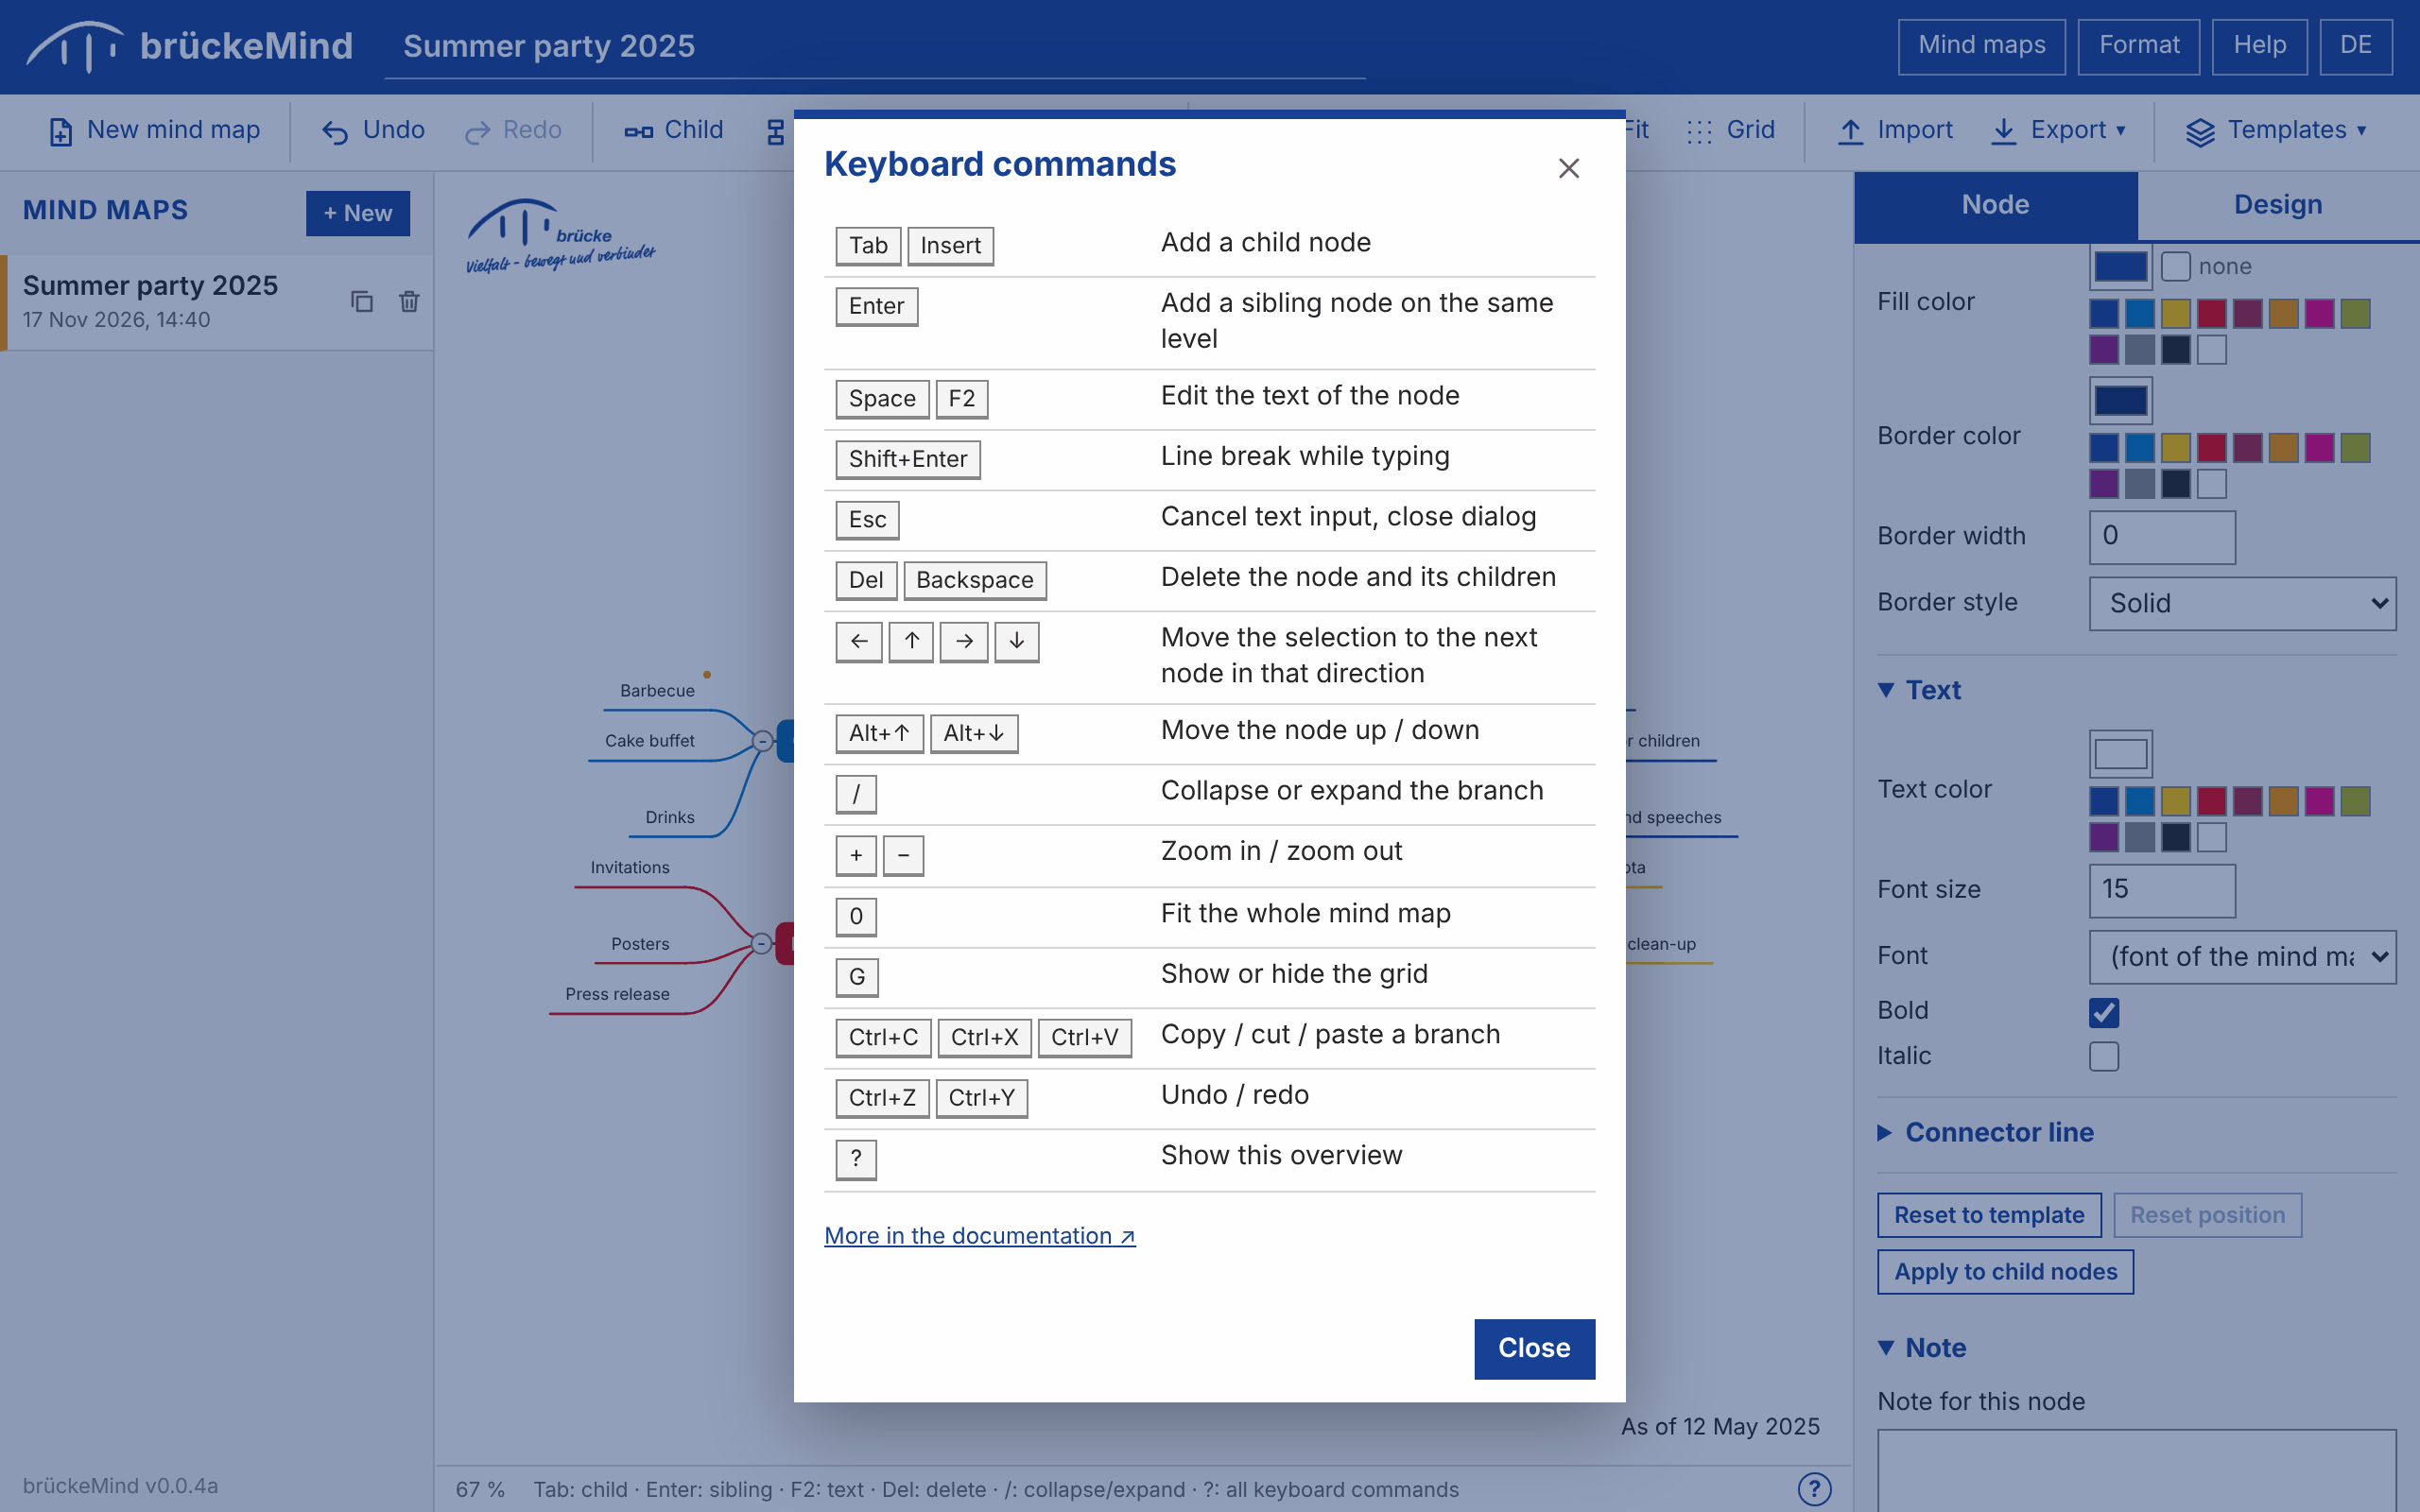
| ? | Show the overview of keyboard commands |
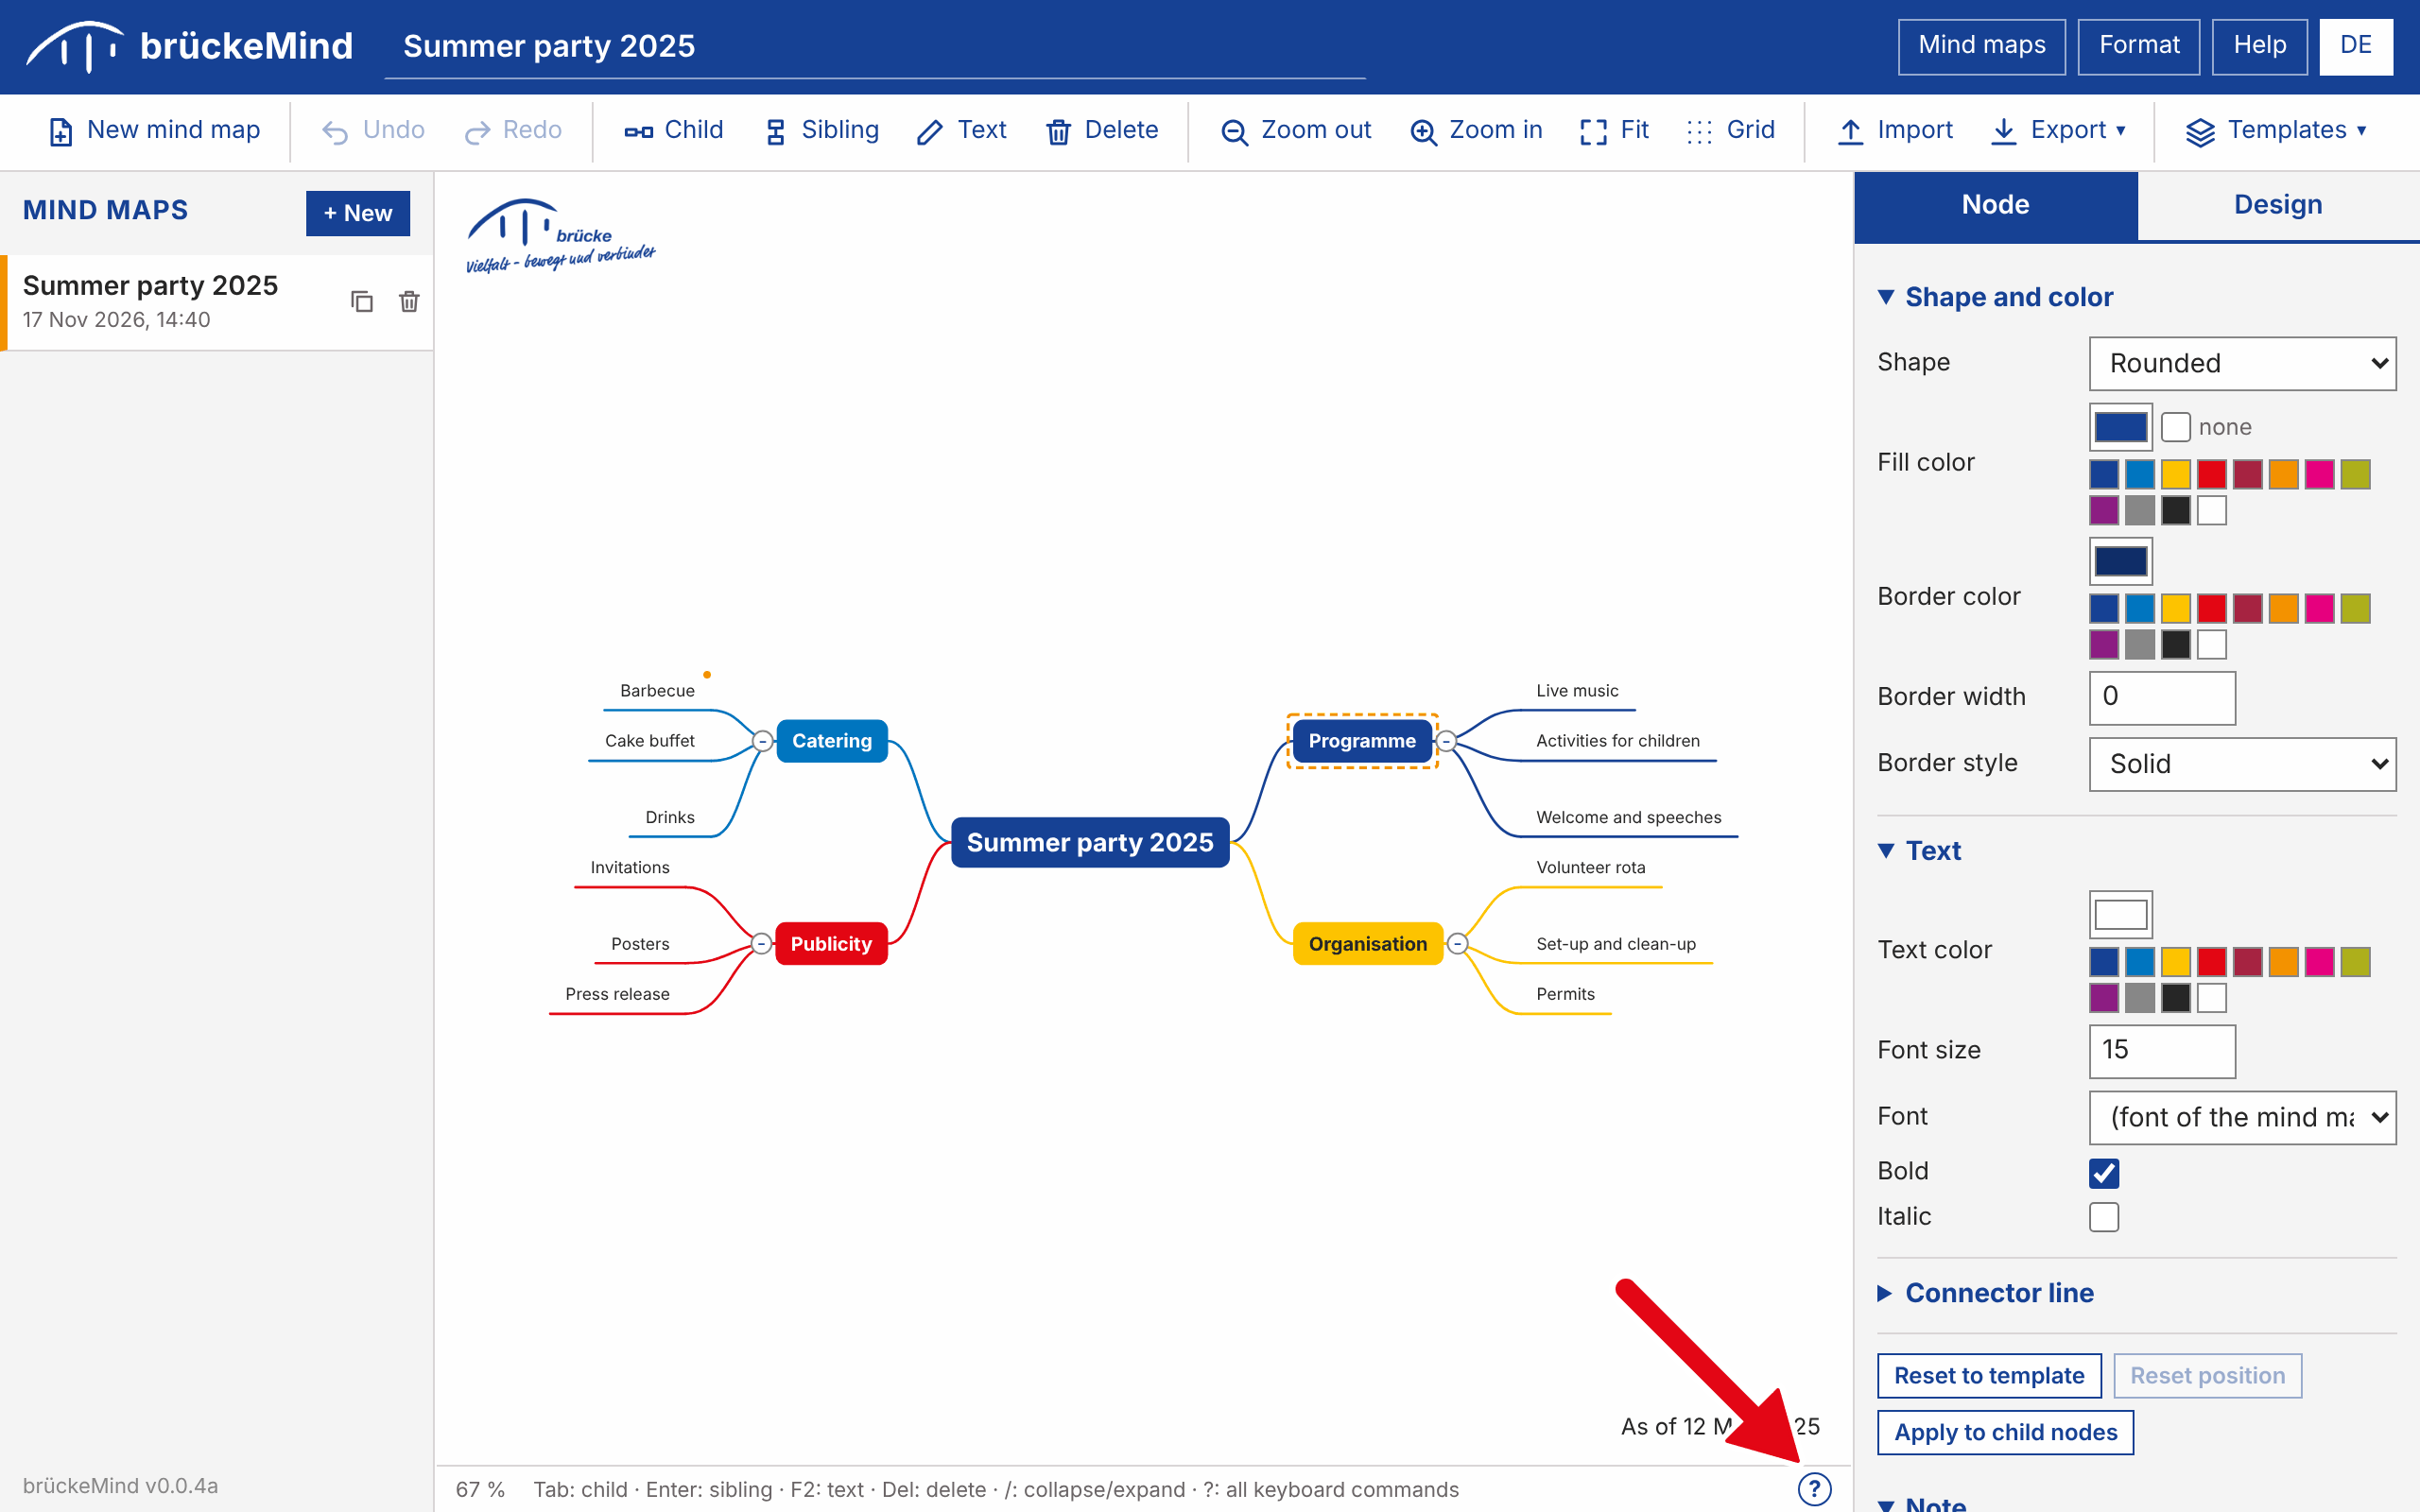
The small ? button at the right end of the status bar below the canvas (or the ? key) opens a short overview of all keyboard commands inside the application. On macOS use Cmd instead of Ctrl.
7. Colors and shapes
Single nodes (tab “Node”)
| Group | Settings |
|---|---|
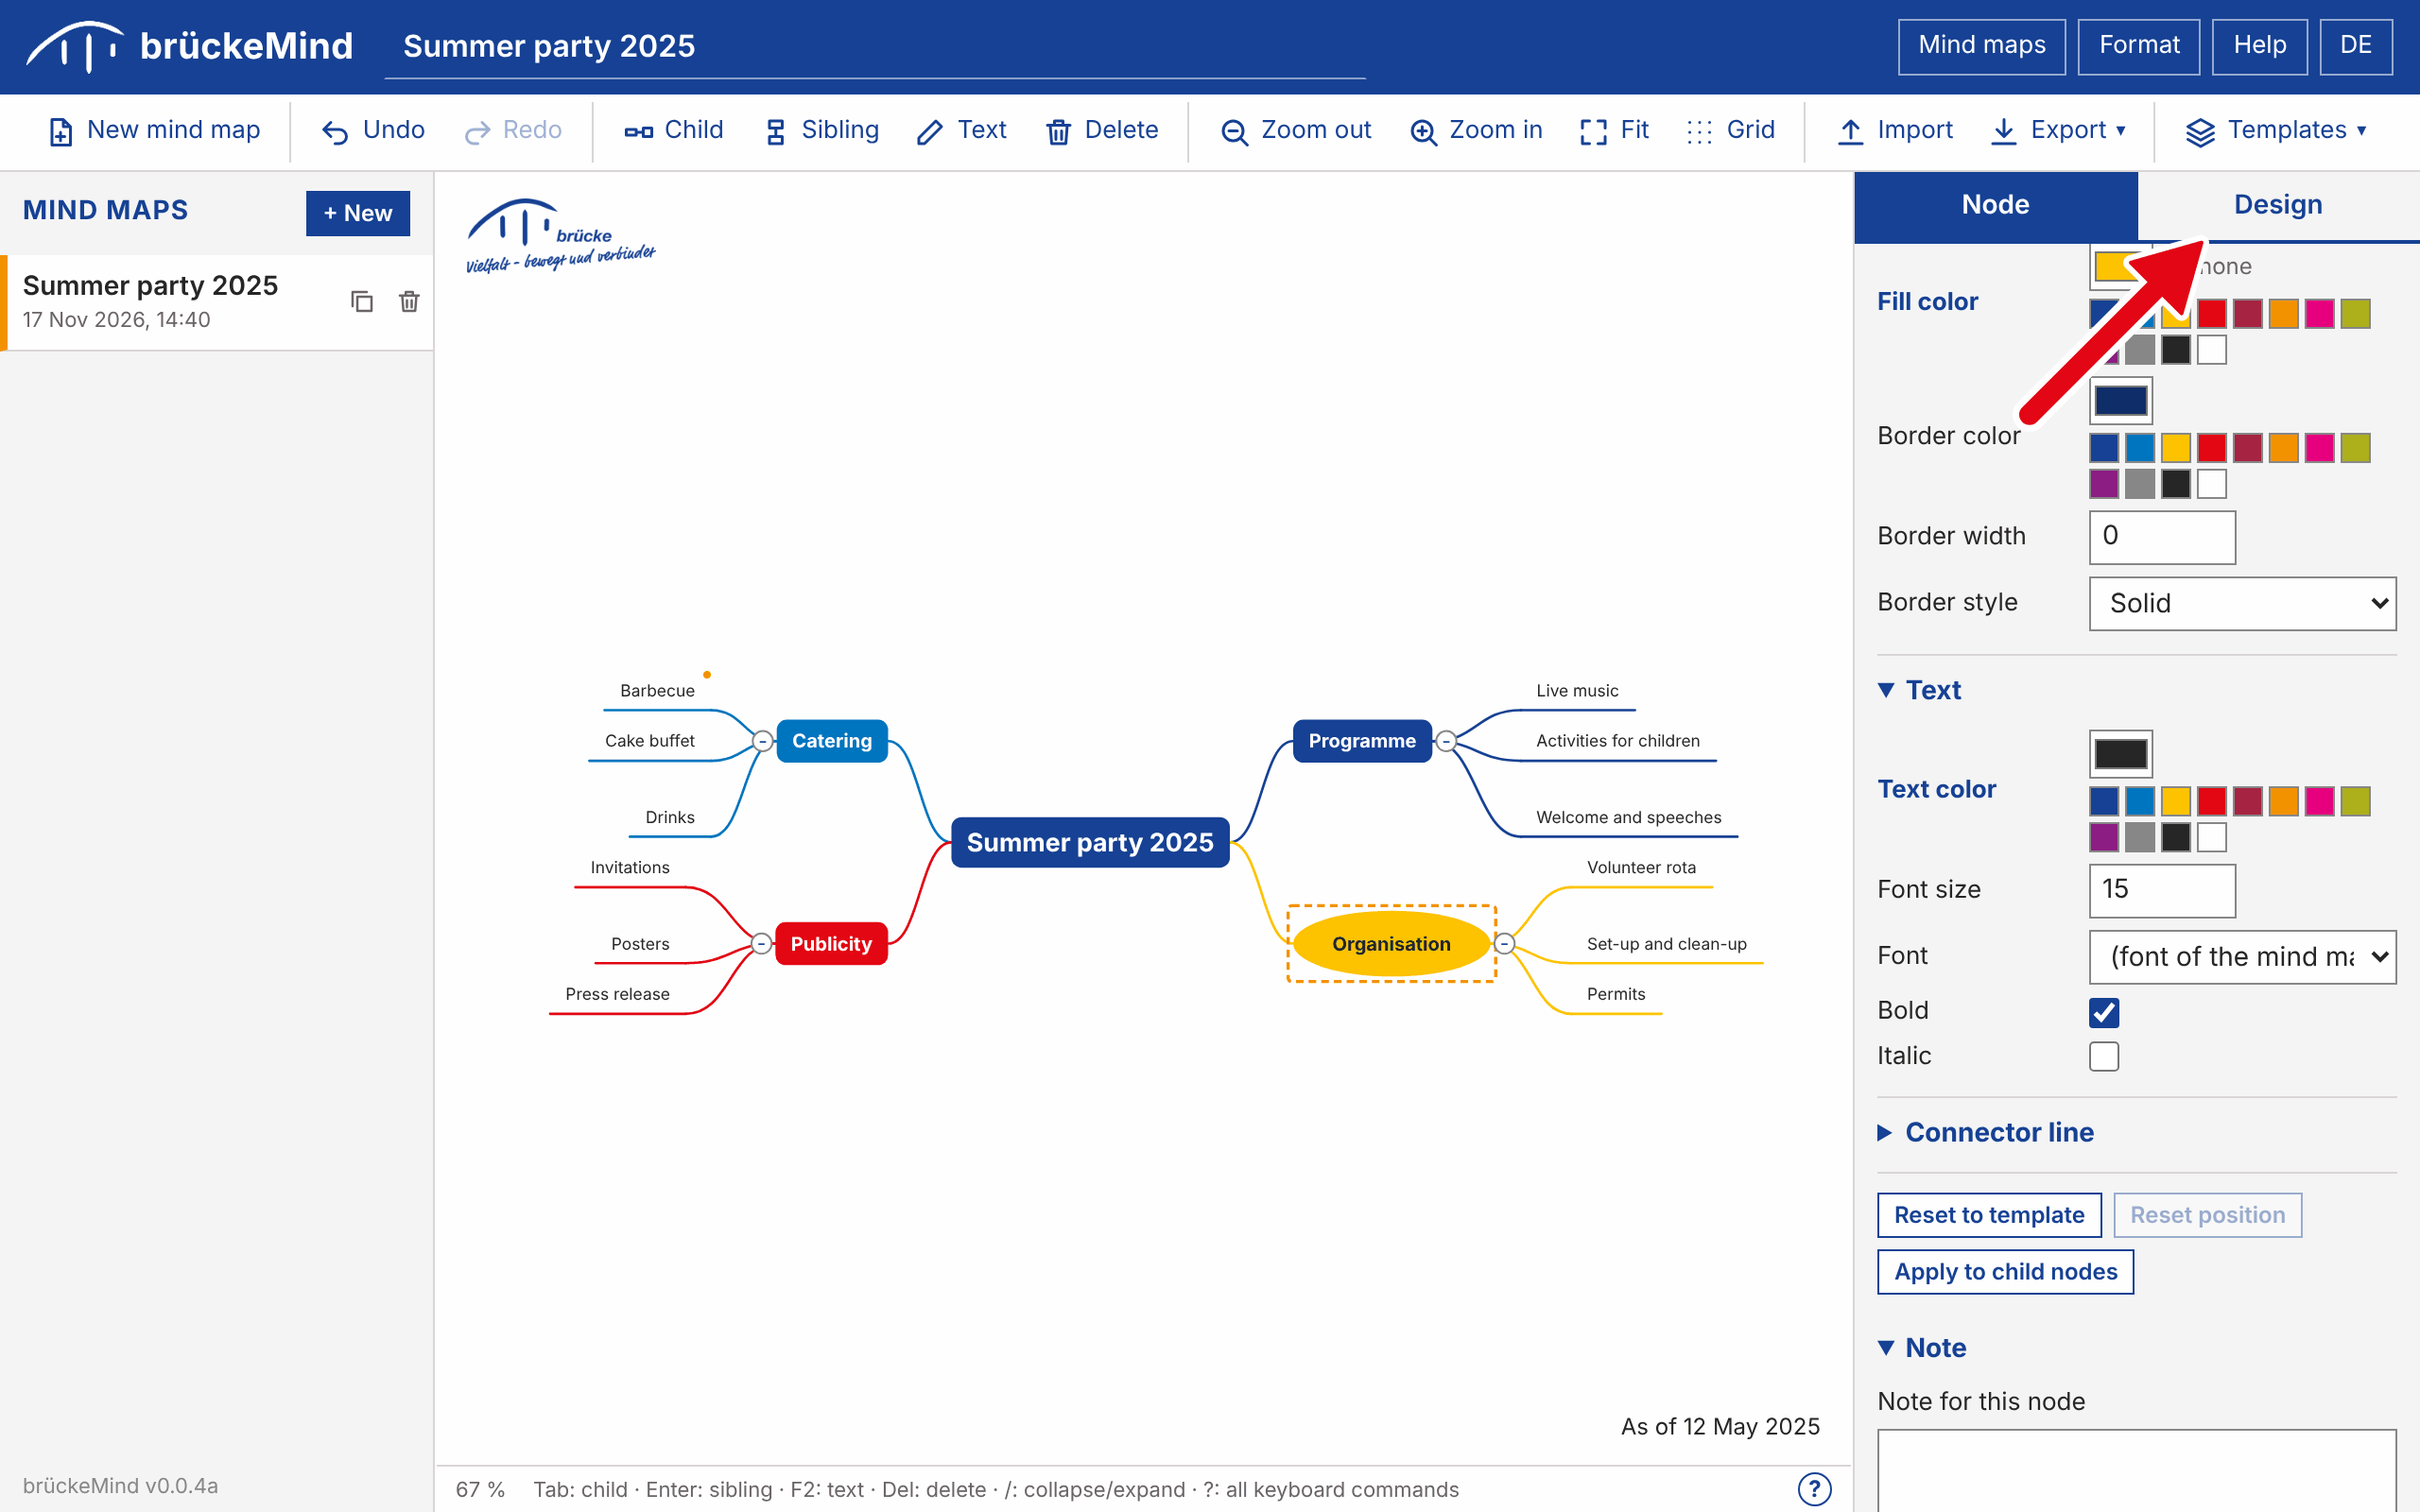
| Shape and color | Shape (rectangle, rounded, pill, ellipse, diamond, hexagon, parallelogram, underlined, text only), fill color (or none), border color, border width and border style. |
| Text | Text color, font size, font, bold, italic. |
| Connector line | Color, width, routing (curved, straight, right-angled) and style of the line to the parent node. |
A setting that differs from the template is shown with a bold blue label. Reset to template removes all individual settings of the node, Apply to child nodes copies them to the whole branch. The color fields offer the colours of the colour concept as swatches.
The whole mind map (tab “Design”)
| Section | Settings |
|---|---|
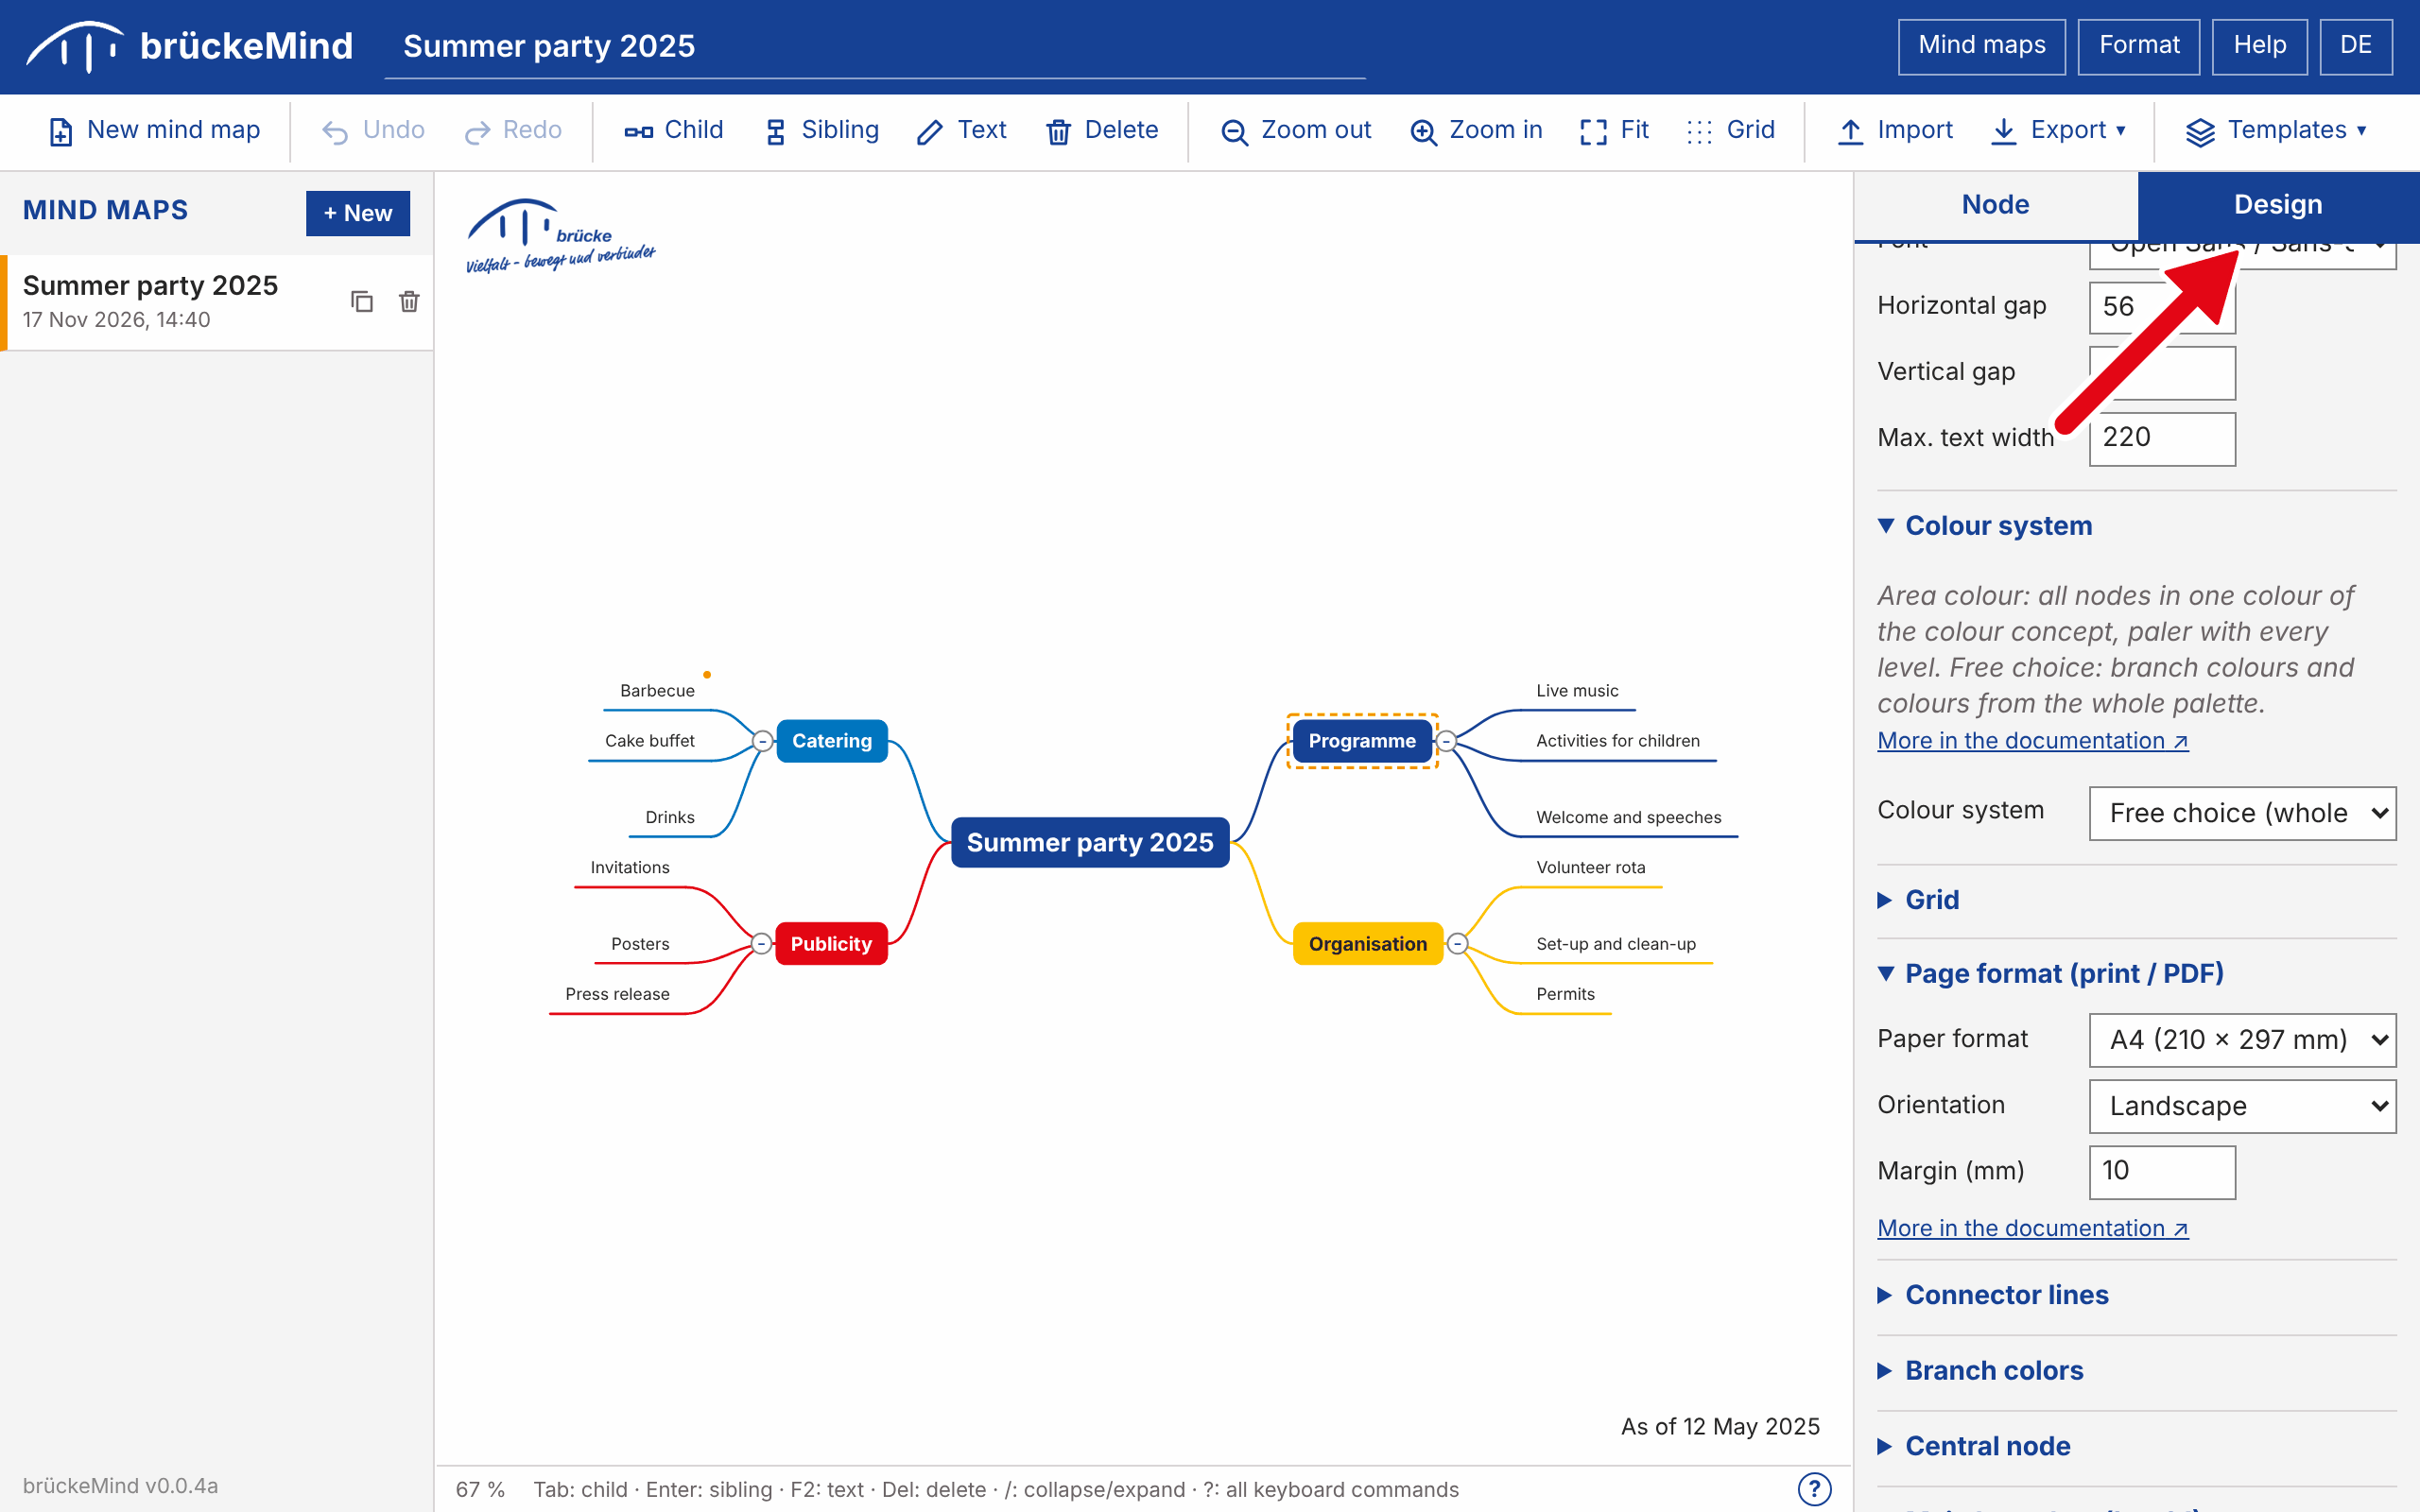
| General | Background color, font, horizontal and vertical gap, maximum text width. |
| Grid | Show the grid dots, grid spacing and dot color. |
| Page format (print / PDF) | Paper format (A5 to A0, Letter, Legal), orientation and margin used for printing and for the PDF export. |
| Connector lines | Default color, width, routing and style. |
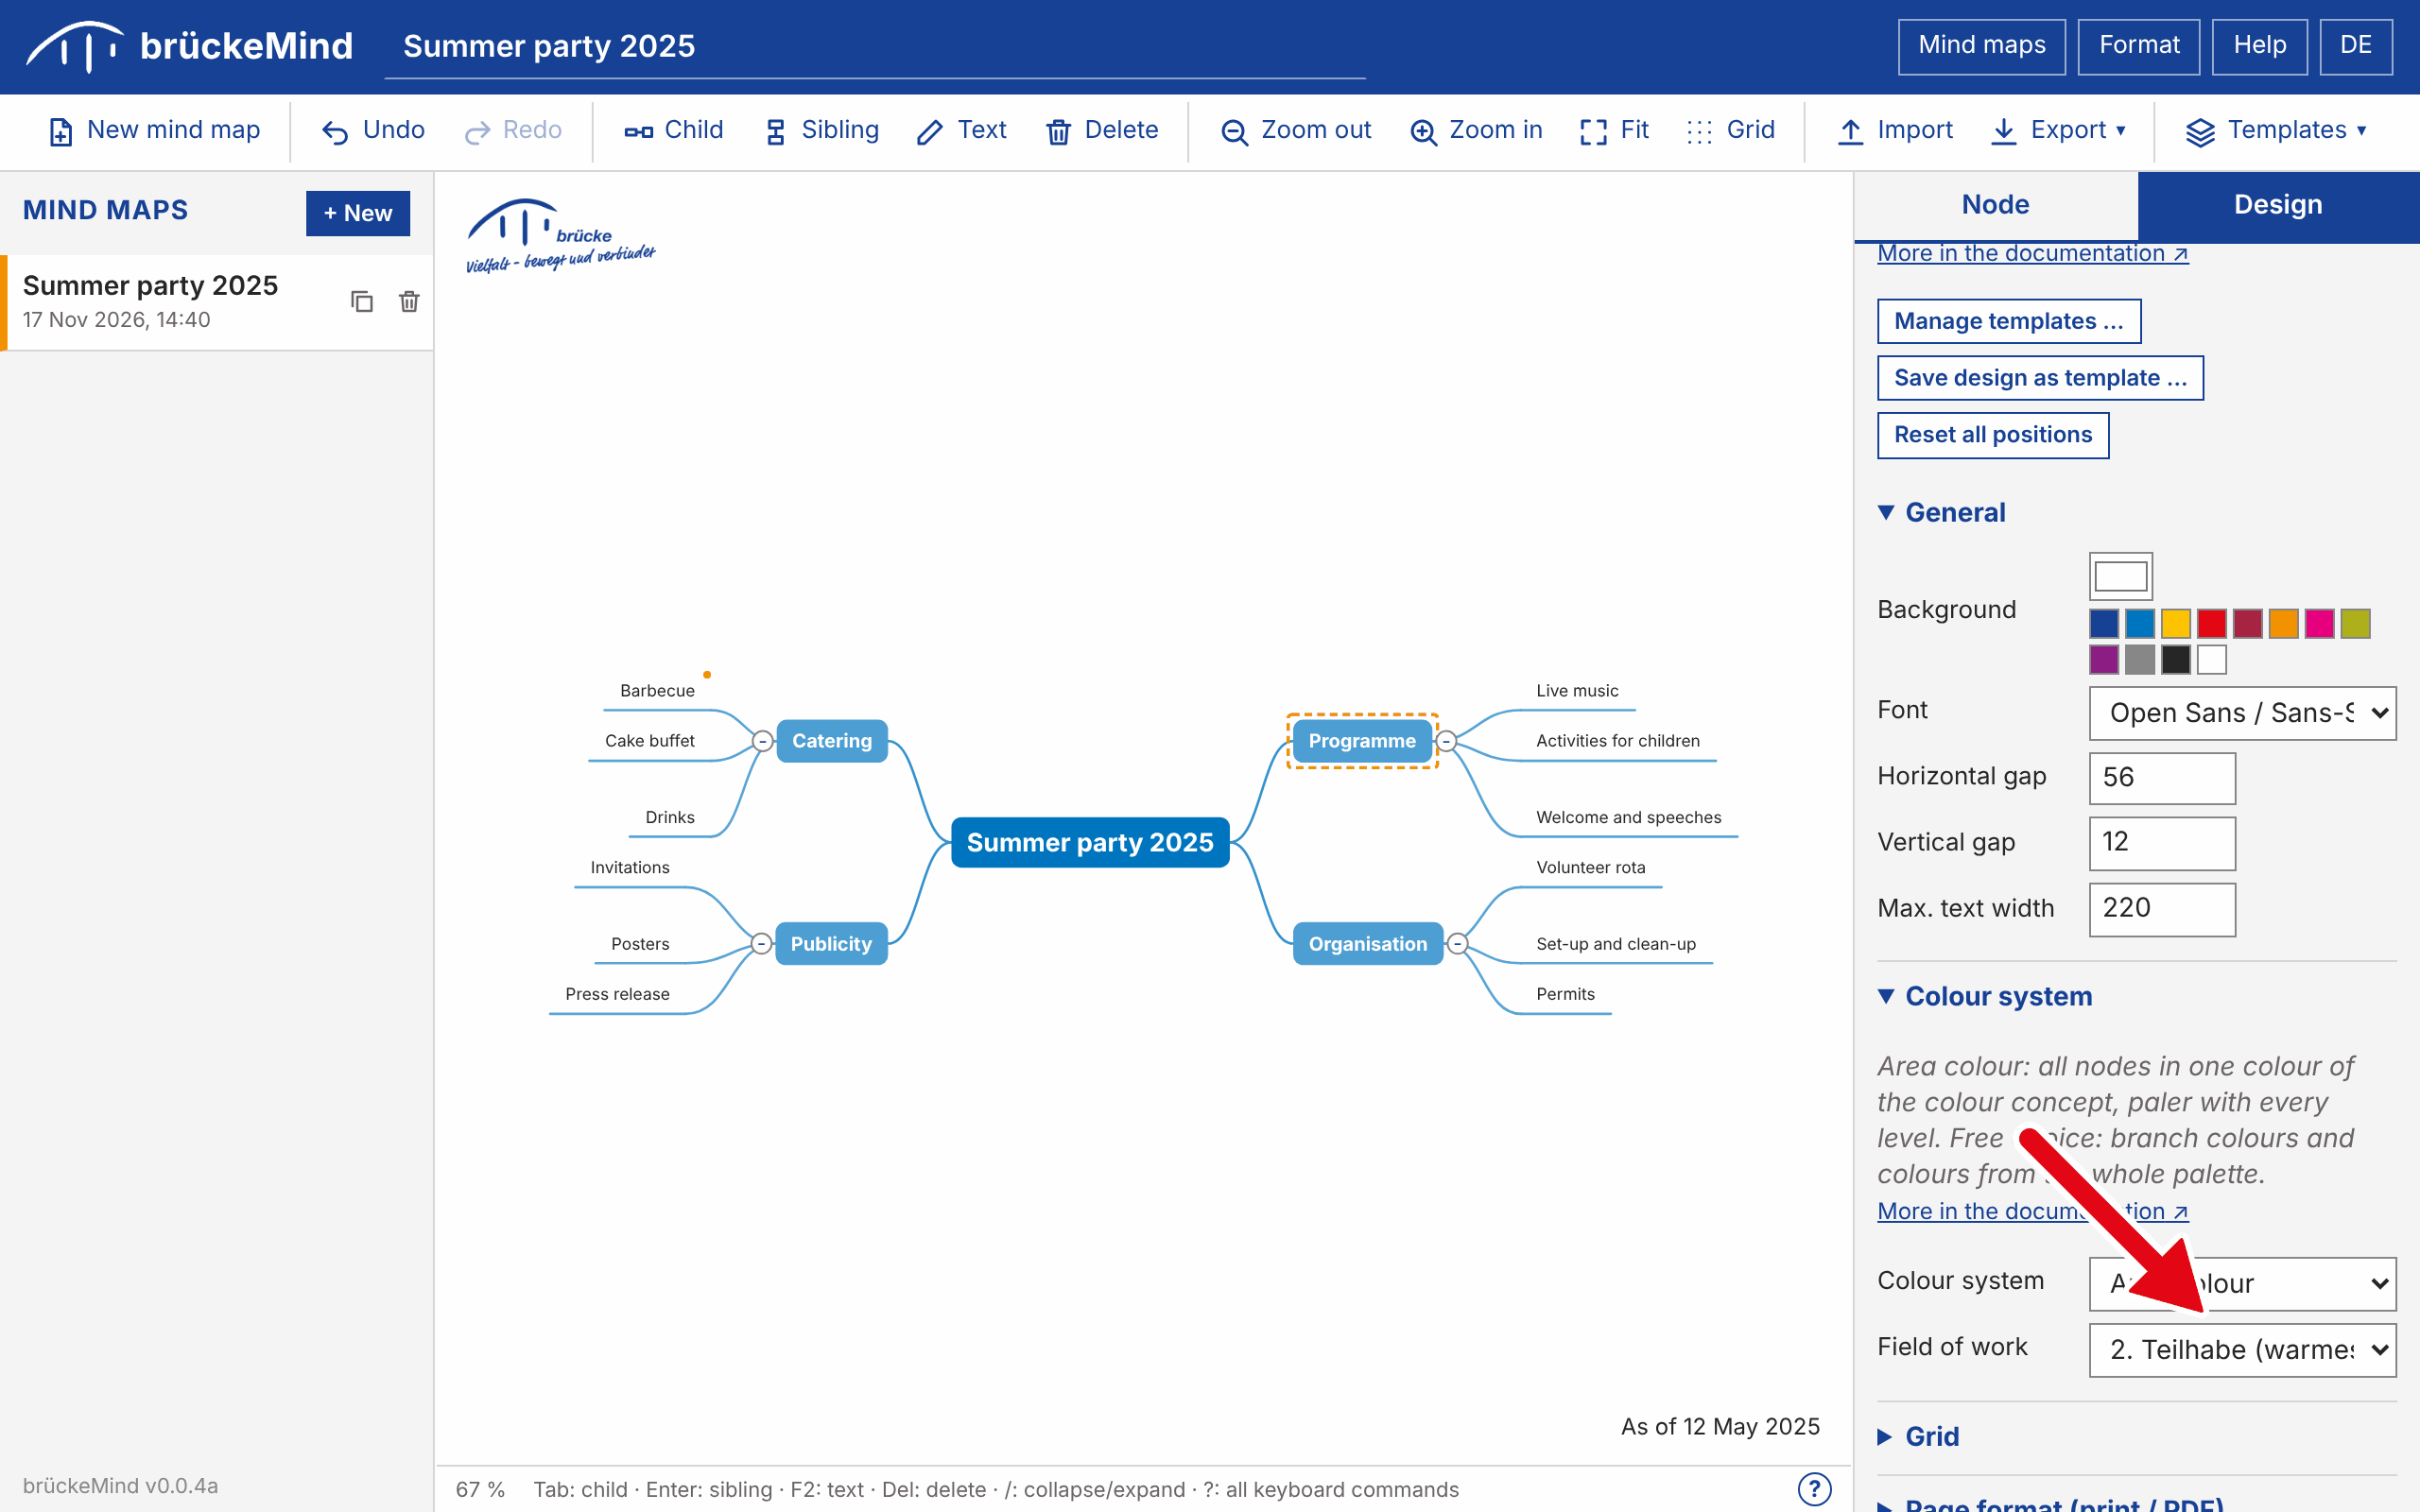
| Colour system | Area colour or free choice, see The two colour systems. |
| Branch colors | A list of colors that are assigned to the main branches in turn. Each level decides whether the branch color is used as fill color, as border color or not at all. |
| Central node, main branches, sub nodes | Default shape, colors, border and text style per level. |
| Fixed elements | Images (e.g. a logo), texts and a date line that are always visible, with position, offset, size and opacity. |
The colour concept
The default colours follow the colour concept of Brücke Rendsburg-Eckernförde e.V. The nine colours of the fields of work are assigned to the main branches in this order, and all ten are offered as swatches at every colour field (the name appears when the pointer rests on a swatch).
| Colour | Name | Field of work | Value |
|---|---|---|---|
| brückeblau | 1. Beratung | #164194 (RGB 22, 65, 148) | |
| warmes hellblau | 2. Teilhabe | #0075bf (RGB 0, 117, 191) | |
| sonnengelb | 3. Kindertagesbetreuung | #fdc300 (RGB 253, 195, 0) | |
| rot | 4. Kinder-, Jugend- und Familienhilfe | #e30613 (RGB 227, 6, 19) | |
| bordeauxrot | 5. Pflege | #a62341 (RGB 166, 35, 65) | |
| orange | 6. Behandlung | #f39200 (RGB 243, 146, 0) | |
| magenta | 7. Arbeitsförderung | #e6007e (RGB 230, 0, 126) | |
| grün | 8. Verpflegungs- und Hotel | #adaf1b (RGB 173, 175, 27) | |
| lila | 9. Förderung des Ehrenamts, Selbsthilfe / Kibis | #8c1d82 (RGB 140, 29, 130) | |
| grau | Zusatzfarbe, mit allen Farben kombinierbar | #878787 (RGB 135, 135, 135) |
Mind maps that already exist keep the colours they were created with. To use the new colours there, apply the base template again (Templates > Manage templates > Apply).
The two colour systems
A mind map uses one of two colour systems. The choice is part of the design, so it is stored in the template and saved with the mind map.
| Colour system | How colours are assigned |
|---|---|
| Area colour | You choose one field of work of the colour concept. The central node has its colour; every level further away is paler, and all nodes of one level have the same colour. For a single node you can only choose another tone of the same colour, for example other yellows in the field “Kindertagesbetreuung”. How pale a node is always follows from its level. |
| Free choice | Colours come from the whole palette: each main branch gets the next branch colour, and every colour of a node can be changed freely. |
The settings are in the Design tab under Colour system:
- Colour system switches between the two systems, if the template allows a choice.
- Field of work selects the area for the area colour system.
- Allowed is only available when a template is edited (Templates > Manage templates > Edit): Area colour only, Free choice only or Choice per mind map. A template that fixes one system does not offer the switch in its mind maps.
In the area colour system the Node tab shows the tone instead of the colour fields, and each level only has the setting Filled. Colours set in the free system are kept and come back when you switch back. Unfilled shapes such as Underlined only show the colour in their line; choose a filled shape for a level to see its colour more clearly.
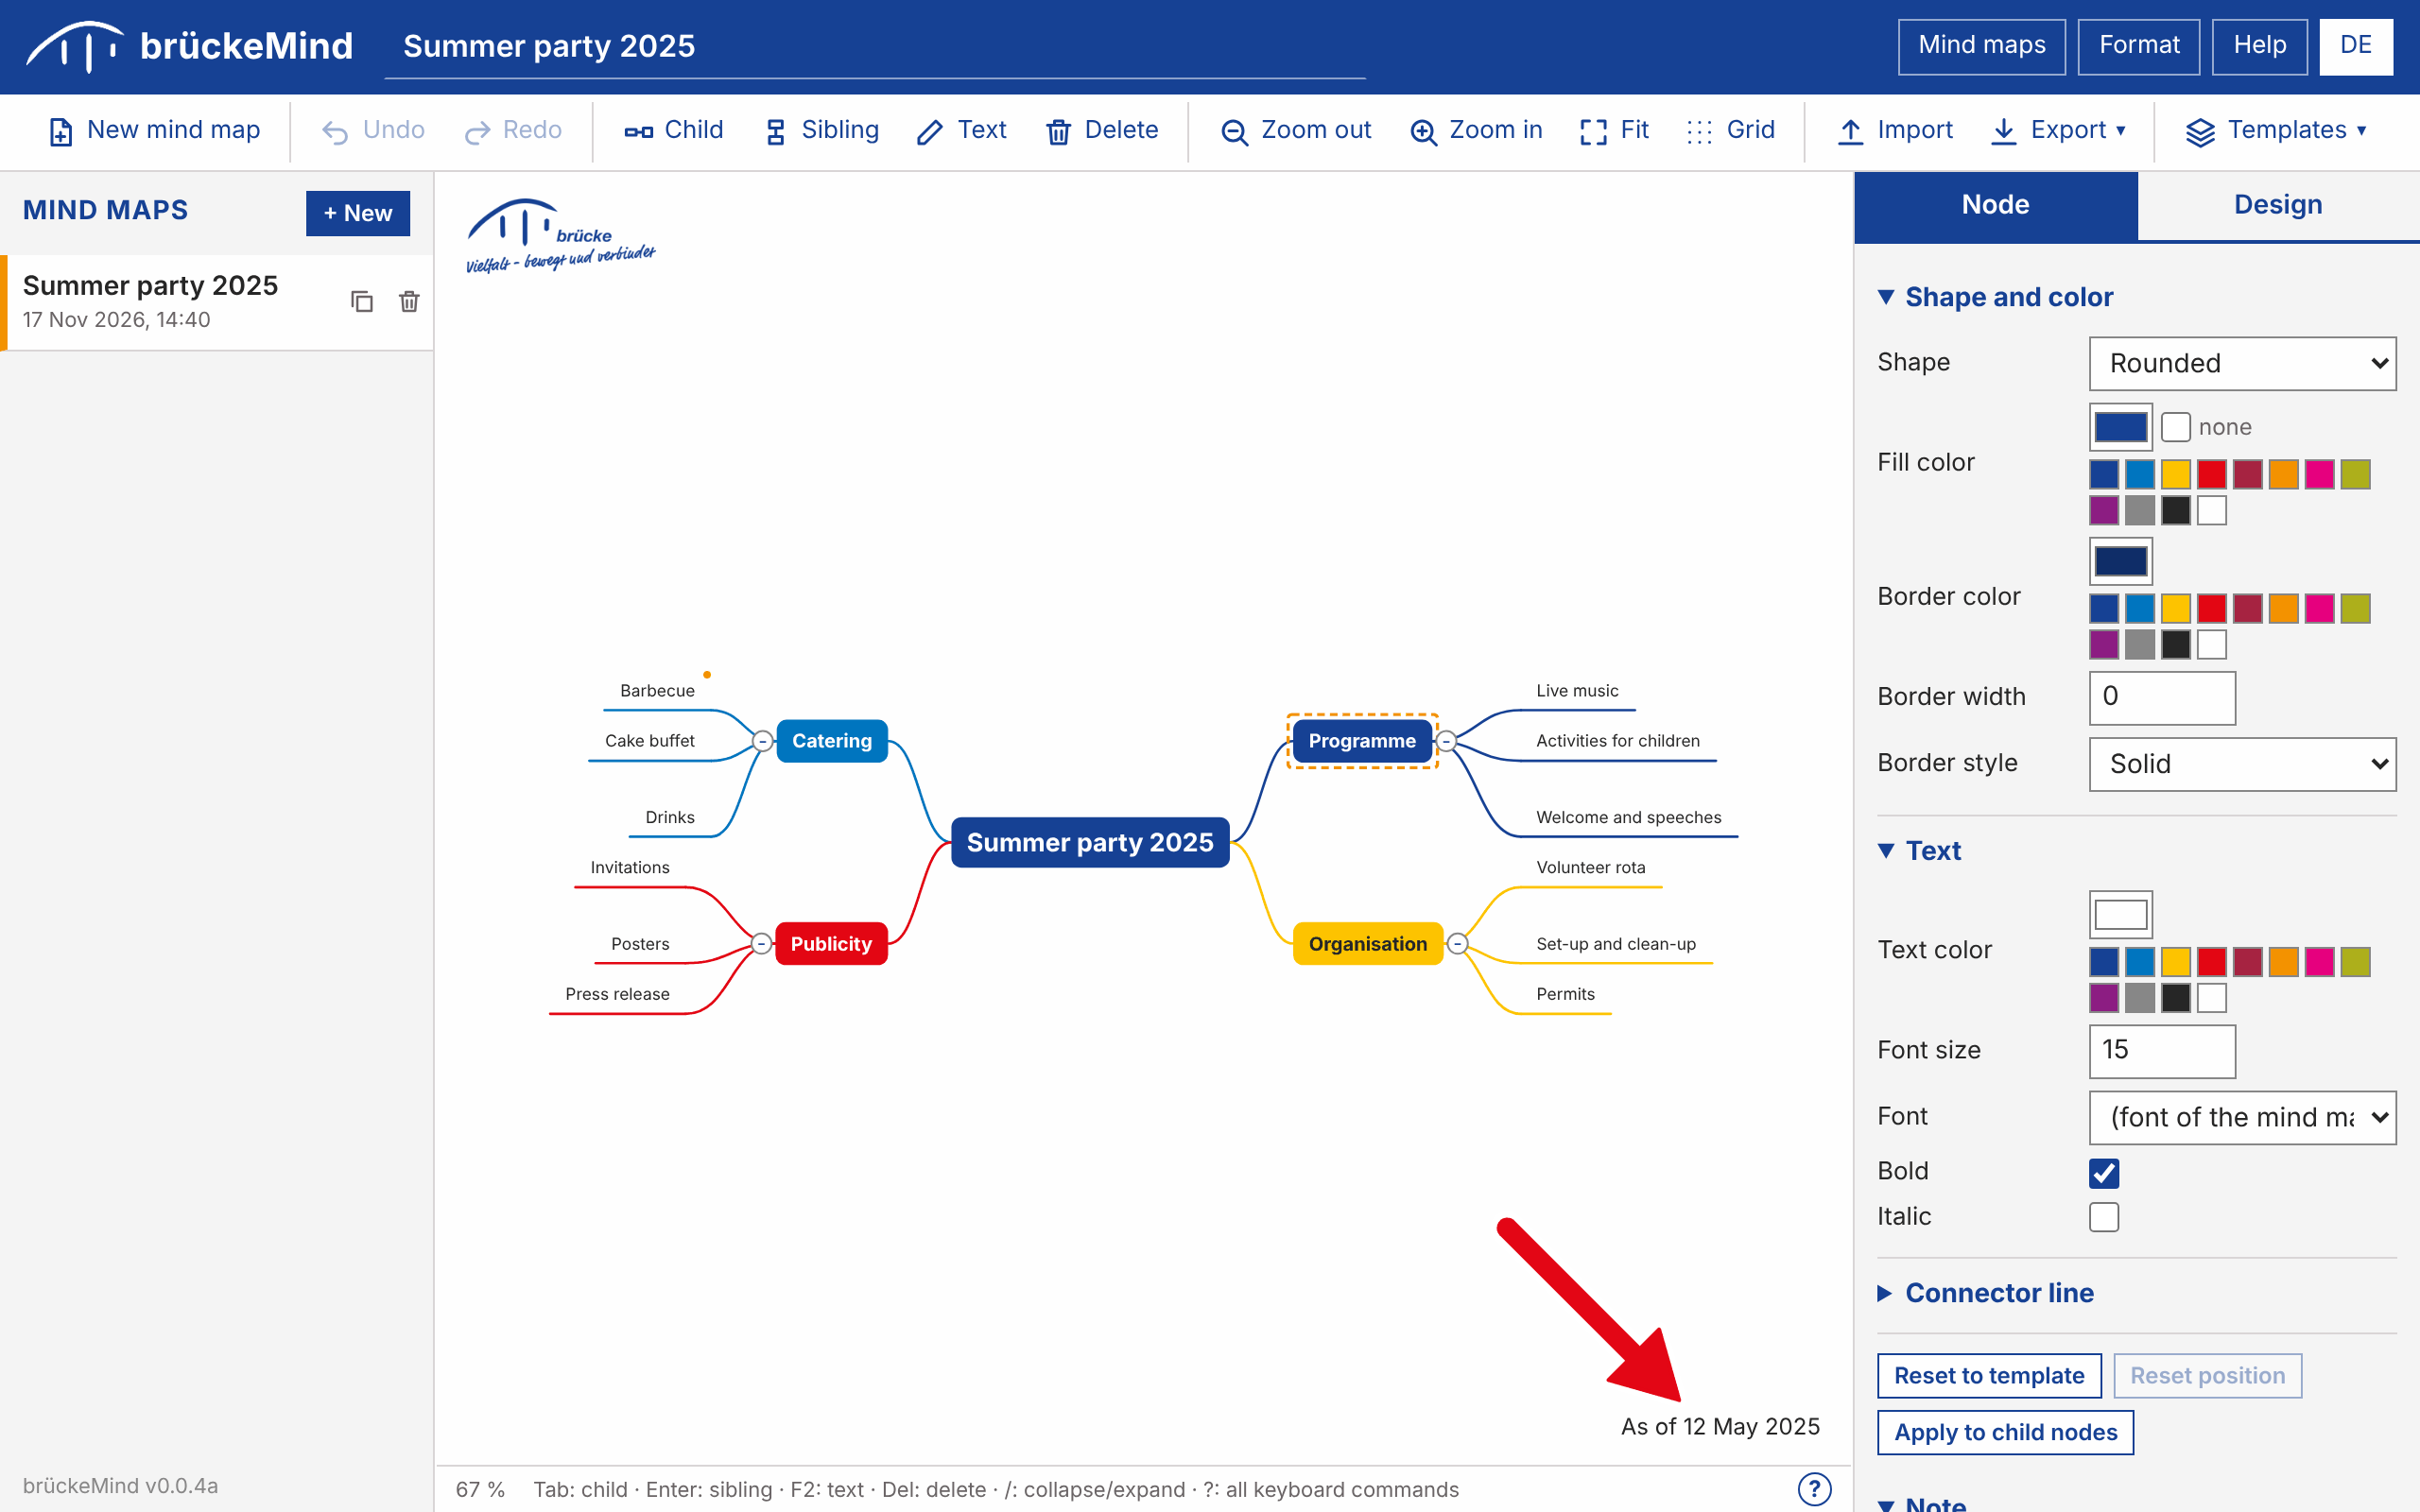
Showing the date (“as of”)
Under Design > Fixed elements, + Date adds a line such as
Stand: 1. Februar 2024. Like a logo it stays visible on the canvas and appears in image,
PDF and print output. Its settings are:
| Setting | Meaning |
|---|---|
| Text before | Text in front of the date, for example Stand:. It may be empty. |
| Date | Last change of the mind map (updates automatically with every change),
Today or a Fixed date that you enter. The date of the last change is stored with the
mind map and exported with it (in the OPML file and in layout.xml), so an imported
mind map still shows when it was last changed, not when it was imported. Showing or hiding the grid
and changing the view do not count as a change. |
| Notation | Written out (1. Februar 2024) or short (01.02.2024). The date is written in the language of the user interface. |
| Position, offset, color, font size | Where and how the line is shown. |
Because fixed elements belong to the design, the date line and its position can be defined in a template or in the base template and are then part of every new mind map.
Only fonts installed on the computer are used; no fonts are downloaded.
8. Templates
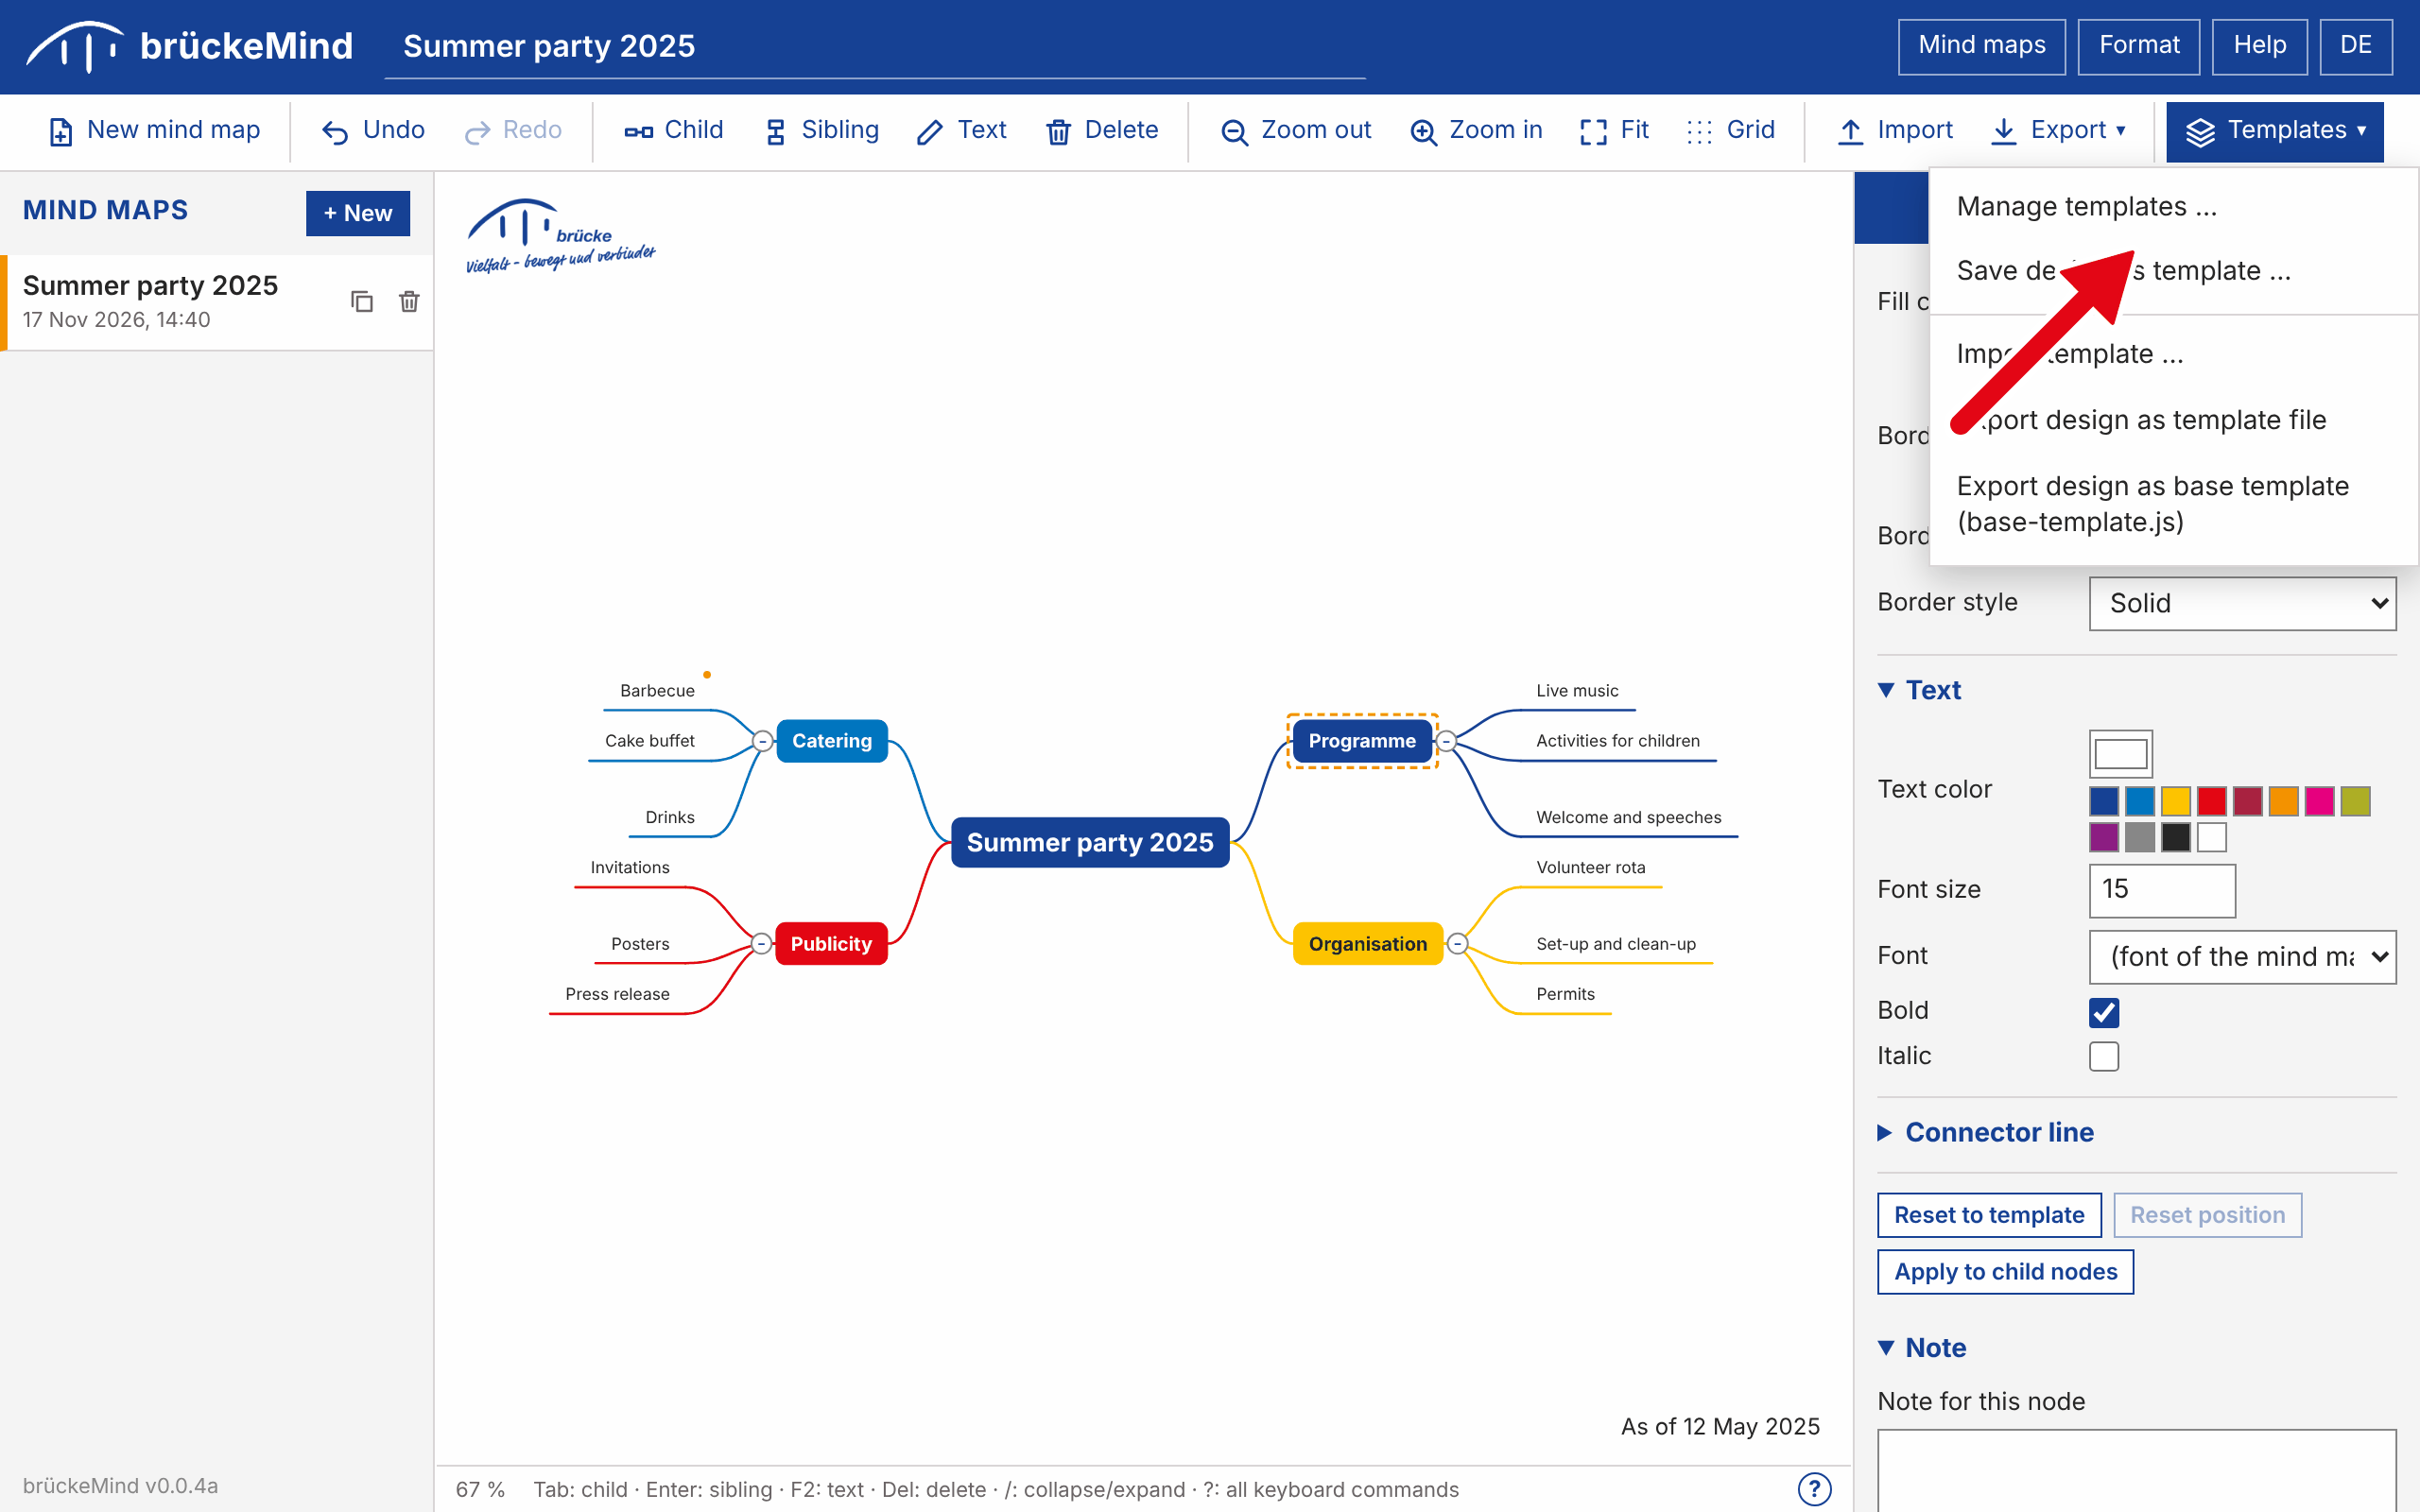
A template is a reusable design: everything from the Design tab. Each mind map carries its own copy of a template, so changing a template later does not change existing mind maps.
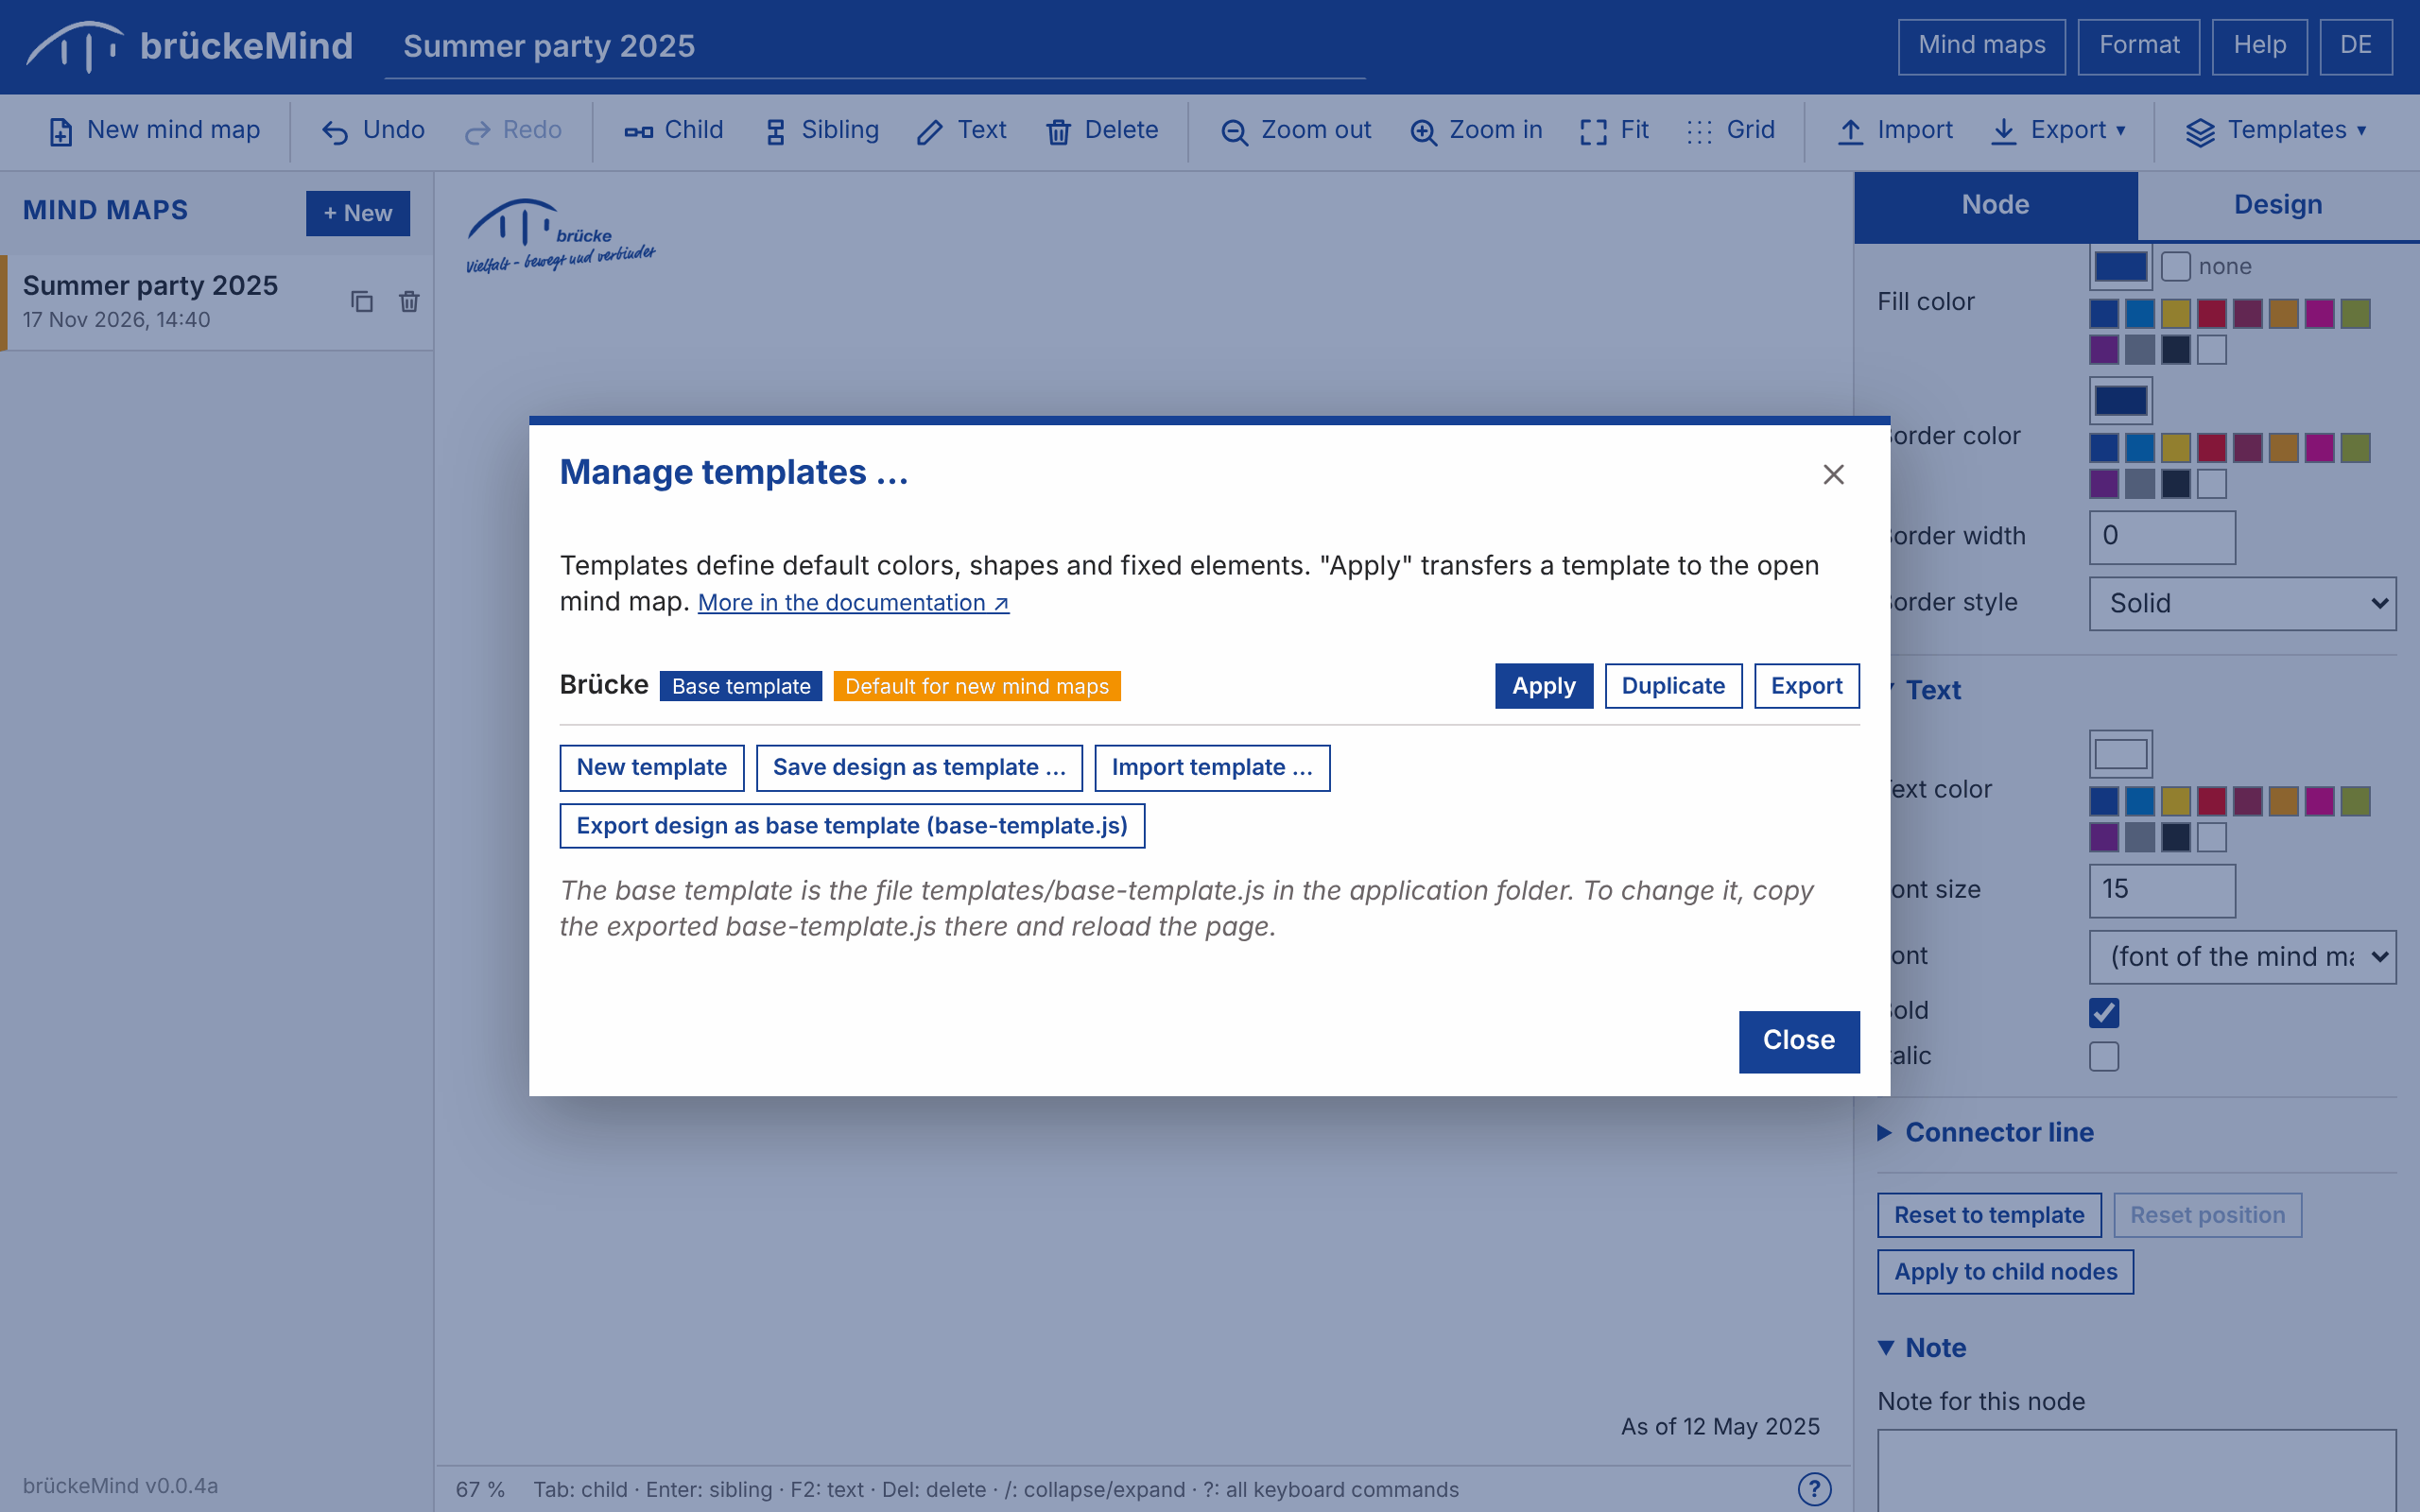
Open Templates > Manage templates to
- apply a template to the open mind map (individual node settings are kept),
- create, edit, duplicate and delete your own templates,
- choose the template that is used as default for new mind maps,
- export a template as a file (
*.bmtemplate.json) and import such a file.
Save design as template stores the design of the open mind map as a new template.
9. The base template
The file templates/base-template.js in the application folder is the base template. It
defines the default colors and shapes and the elements that are always visible, for example a logo.
It is used for new mind maps unless you choose another default.
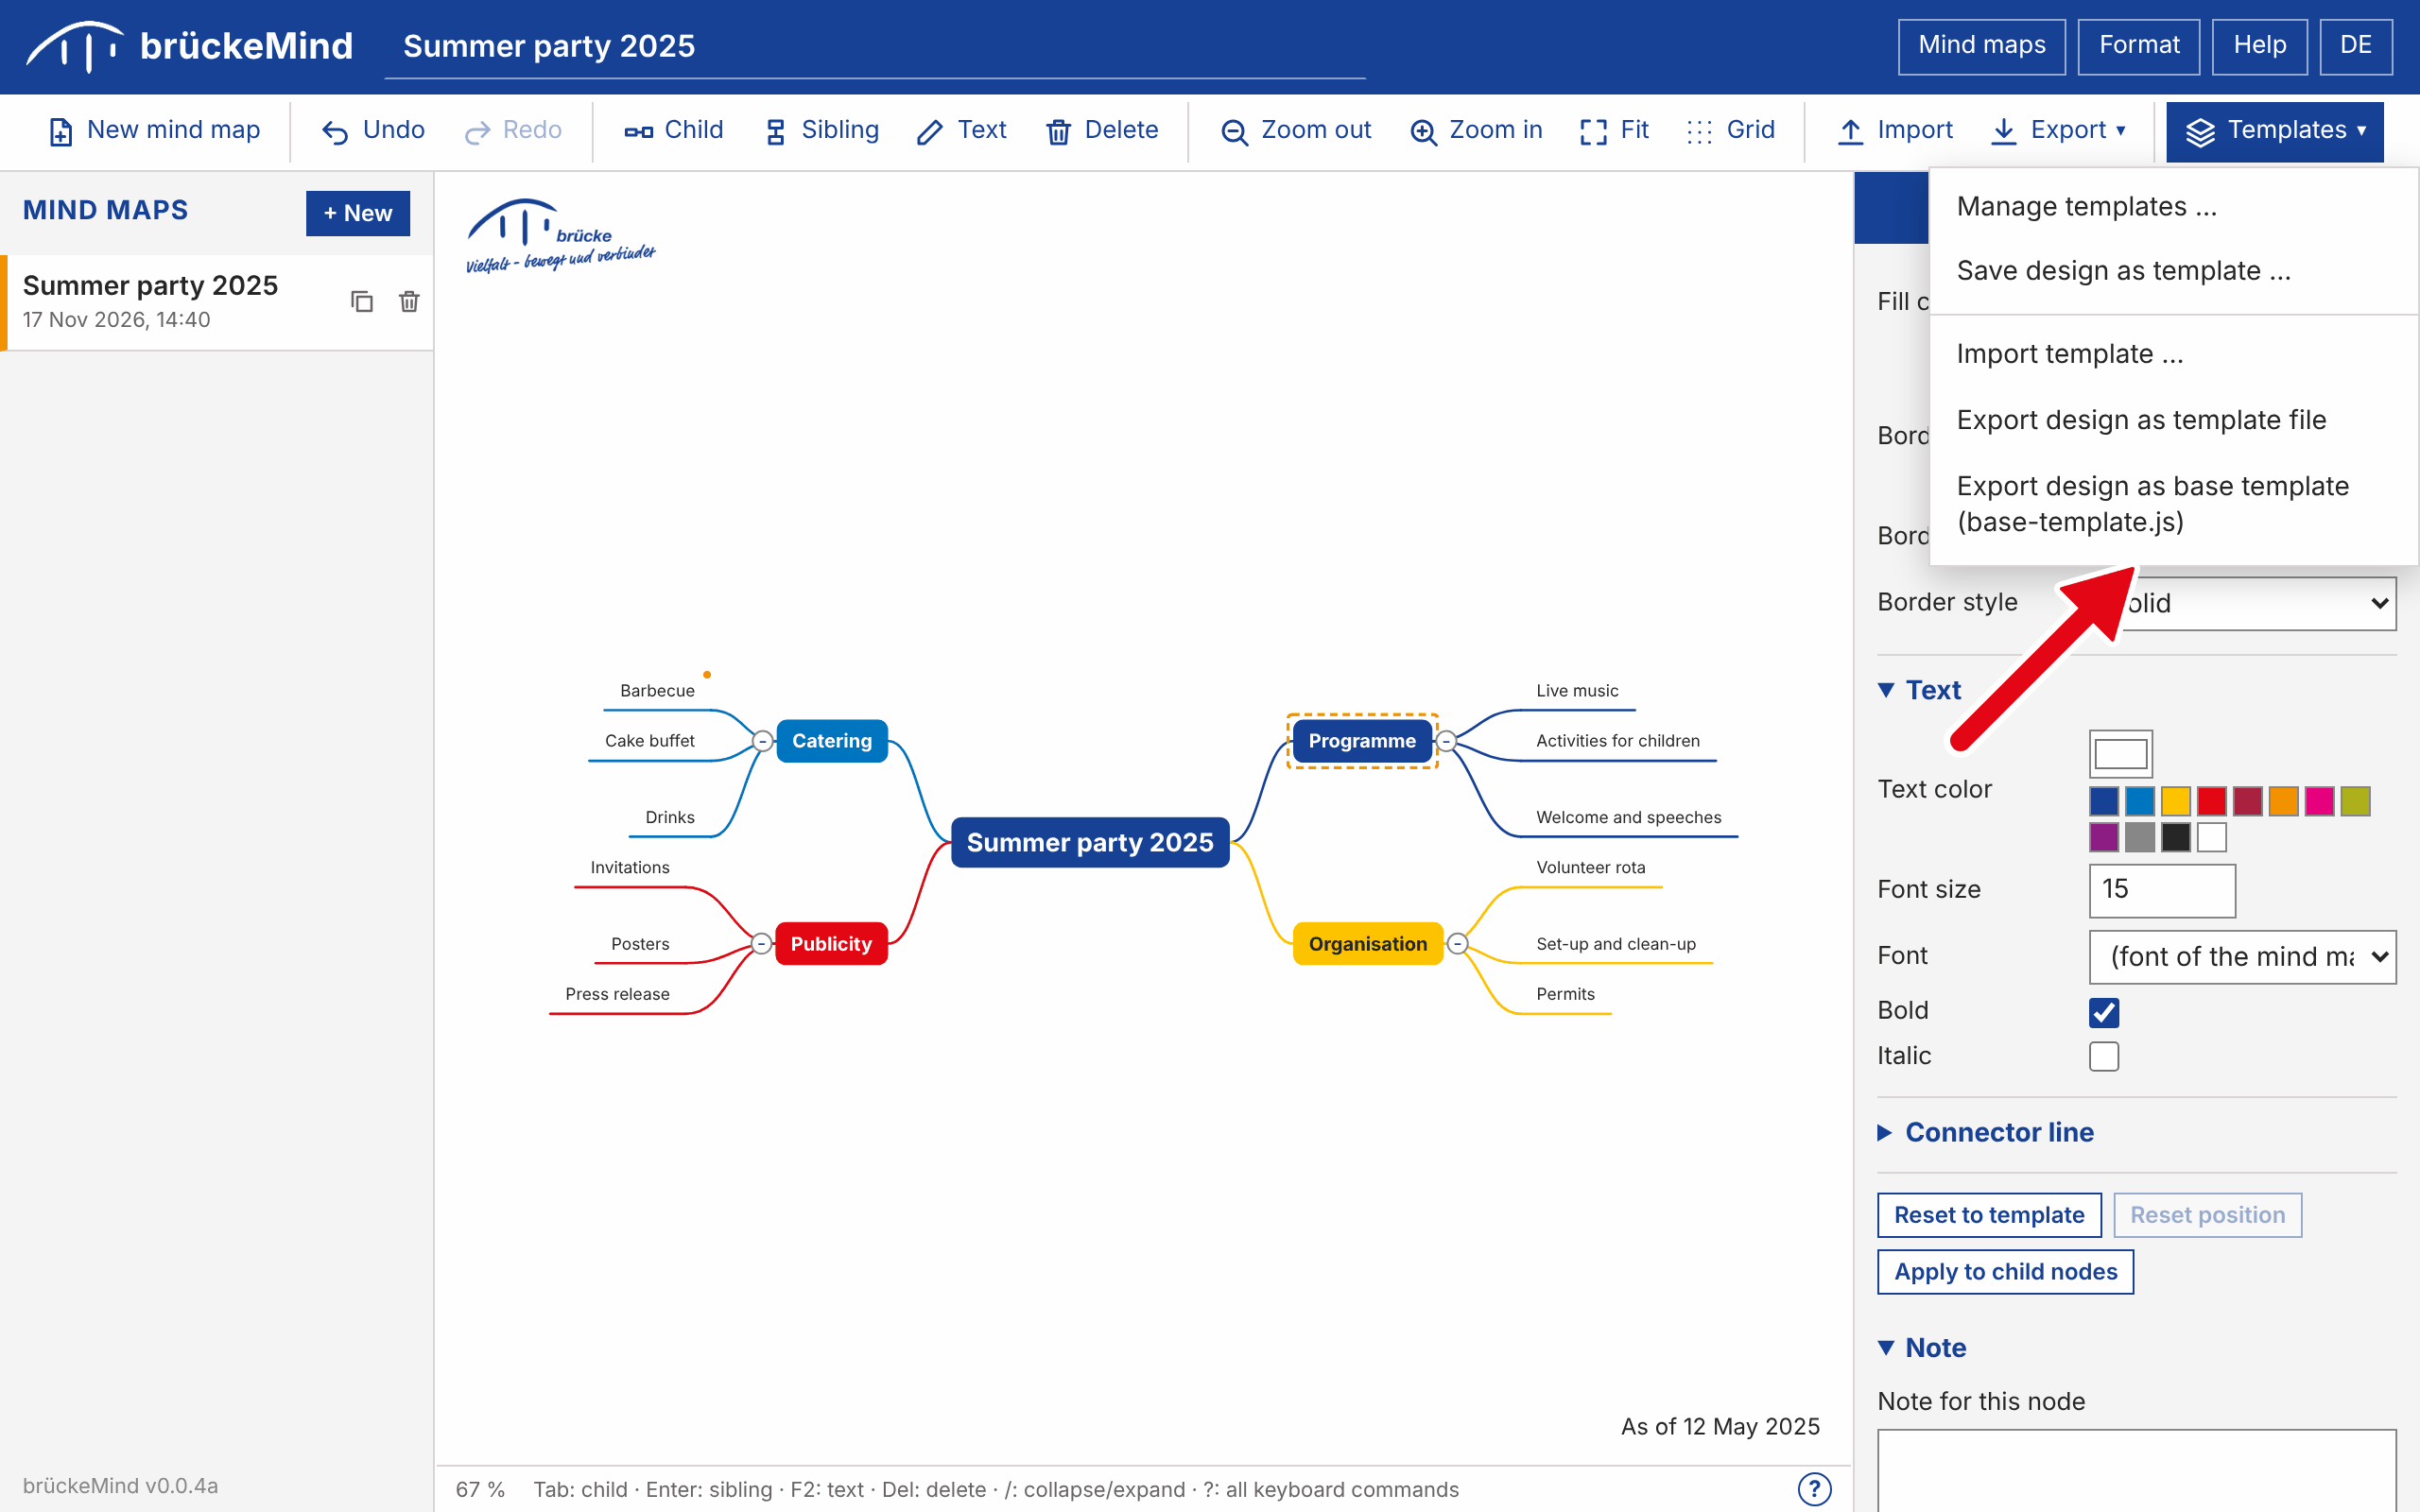
To replace the base template:
- Design a mind map the way the base template should look. Add your logo under Design > Fixed elements.
- Choose Templates > Export design as base template (base-template.js).
- Copy the downloaded file over
templates/base-template.jsand reload the page.
The base template that ships with brückeMind shows the Brücke logo in the upper left corner and the
date of the last change, written out (Stand: 1. Februar 2024), in the lower right
corner.
10. Import and export
| Menu entry | Result |
|---|---|
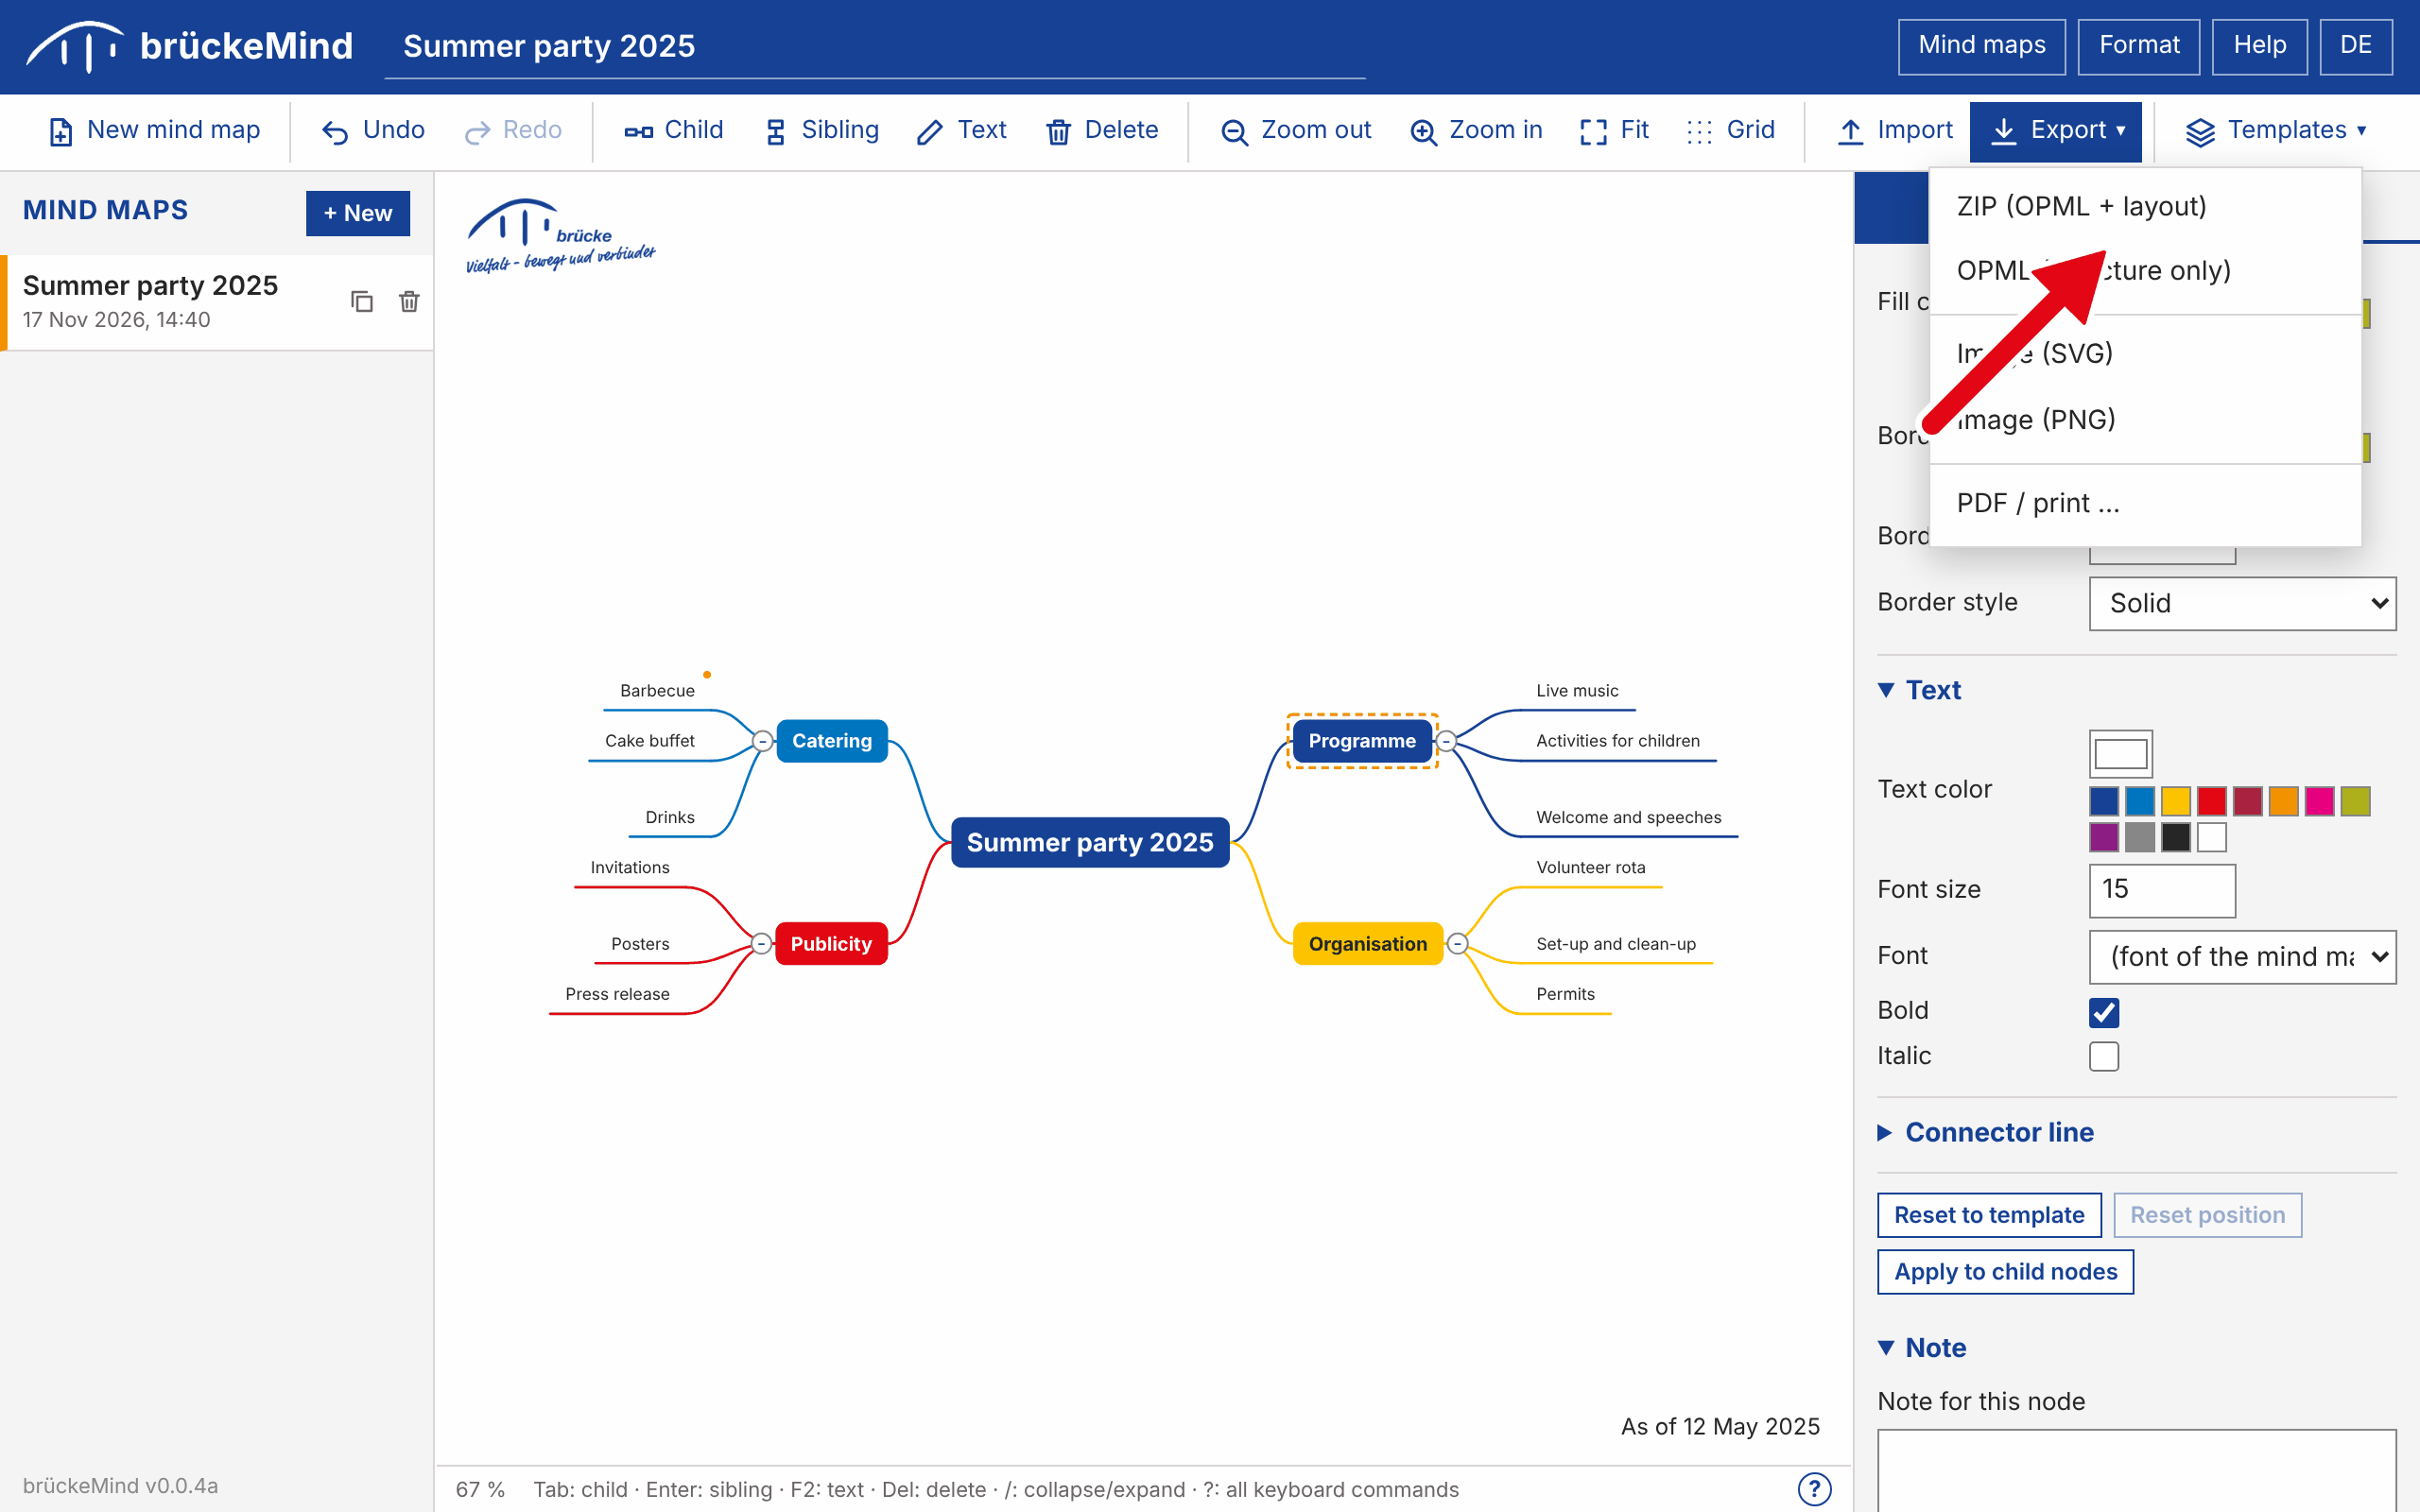
| Export > ZIP (OPML + layout) | A ZIP file with the OPML file and layout.xml. It
restores the mind map completely, including the design. |
| Export > OPML (structure only) | A standard OPML 2.0 file with texts, notes and hierarchy, readable by many outliners and mind map programs. |
| Export > Image (SVG / PNG) | A picture of the whole mind map including fixed elements. |
| Export > PDF / print | Opens a dialog with the page format and then saves a PDF file or opens the print dialog of the browser. See Printing and PDF export. |
| Import | Reads .opml, .xml and .zip files. The imported mind
map is added to the list; existing mind maps are never overwritten. |
An OPML file without layout is shown with the default template.
Printing and PDF export
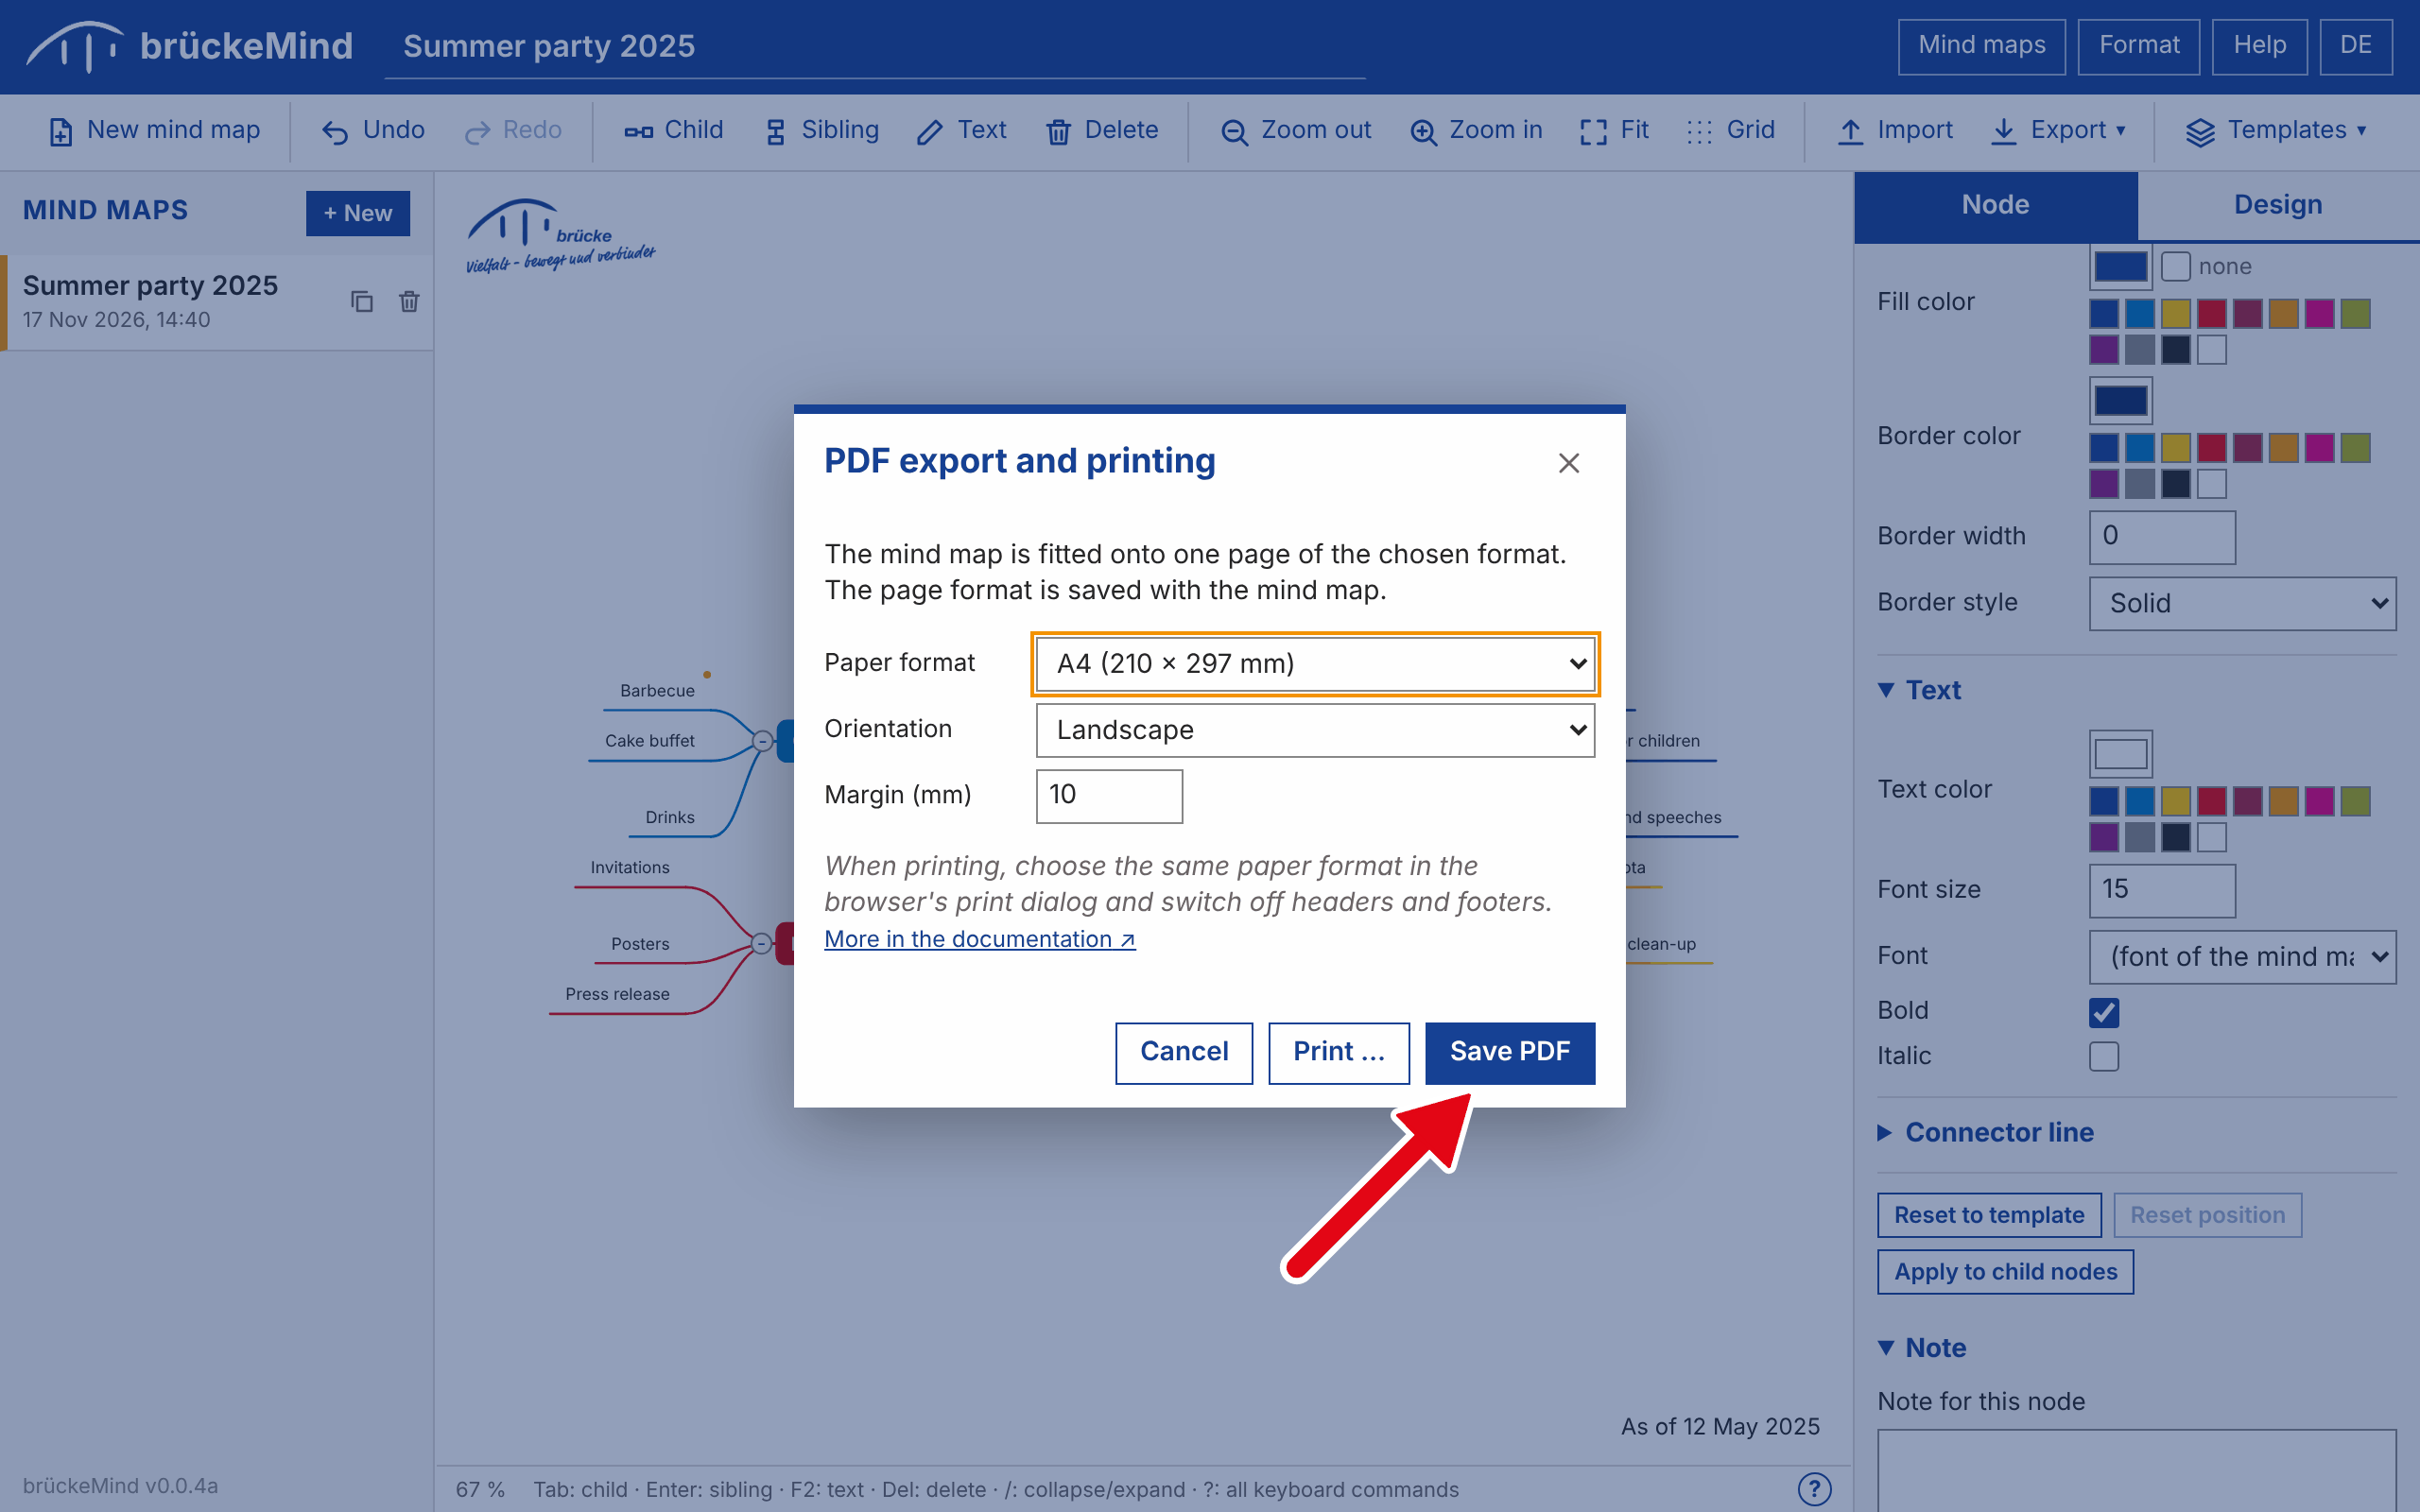
The page format consists of the paper format, the orientation (landscape or portrait) and the margin
in millimetres. It can be set in the dialog Export > PDF / print or on the Design tab
under Page format. It is part of the design, so it is saved with the mind map, stored in
templates and included in layout.xml.
The whole mind map is always fitted onto a single page. Fixed elements such as a logo are placed in the corners of the printable area.
- Save PDF creates a PDF file with exactly the chosen page size. The mind map is embedded as a high-resolution image (200 dpi), so text in this PDF cannot be selected.
- Print opens the print dialog of the browser with the chosen page size. Choose the same paper format there and switch off headers and footers. With the printer “Save as PDF” this way also produces a PDF with sharp vector graphics and selectable text.
11. File formats
OPML
The central node is the single top-level outline element. Texts are stored in the
text attribute and notes in _note. If an imported file has several top-level
outlines, they become main branches below a new central node named after the document title.
<opml version="2.0">
  <head><title>Project</title></head>
  <body>
    <outline text="Project">
      <outline text="Goals" _note="Agree with the team"/>
    </outline>
  </body>
</opml>
layout.xml
Everything OPML cannot store is written to layout.xml: the template of the mind map and,
per node, the collapsed state, the side of a main branch, a manual position (offset) with its growth direction (grow) and
the individual style. Nodes are
addressed by their path of child positions, starting with 0 for the central node, so
0/2/1 is the second child of the third main branch.
<brueckemind-layout version="1" appVersion="0.0.4a">
  <map title="Project" created="…" modified="…"/>
  <template name="Brücke"> … </template>
  <nodes>
    <node path="0/0" side="left" collapsed="true">
      <style shape="ellipse" fill="#f39200"/>
    </node>
  </nodes>
</brueckemind-layout>Template files
Templates are JSON files with "format": "brueckemind-template". Images of fixed elements
are embedded as data URLs, so a template is always a single file.
12. Tablets, web server and offline app
Installation on a web server
To use brückeMind on tablets, copy the whole application folder to a web server that delivers static files and open its address in the browser of the tablet. No server-side software and no database are needed. With HTTPS it can also be installed as an offline app, see below.
Offline app on the iPad
Delivered by a web server over HTTPS, brückeMind can be added to the home screen of an iPad and then works like an app – also without network.
- Open the address of brückeMind in Safari on the iPad, for example
https://example.org/brueckemind/. - Tap the share button and choose Add to Home Screen.
- Start brückeMind once from the new icon while the iPad is online. The message brückeMind is now also available offline confirms that all files are stored on the iPad.
From then on brückeMind starts from the home screen without network, including this documentation. When the iPad is online and a new version is on the web server, the app shows A new version of brückeMind is ready; Update now switches to it. Your mind maps are kept.
- The app from the home screen and Safari keep their data separately. Mind maps created in a Safari tab do not appear in the app and vice versa; move them with the ZIP export and import.
- Removing the app from the home screen also deletes its mind maps. Export important mind maps as ZIP files first.
- In the app, exports open the share sheet; choose Save to Files to keep the file.
The offline app needs HTTPS (or localhost); this is a rule of the browsers for
service workers. Opened as a file or over plain HTTP, brückeMind works as before, but not offline from
the home screen. On a computer, Chrome and Edge can install brückeMind the same way (install symbol in
the address bar).
Touch gestures
| Gesture | Action |
|---|---|
| Tap a node | Select it |
| Tap the selected node again | Edit its text |
| Long press a node, then drag | Move the node: onto another node to attach it there, to a free place to put it there |
| Drag with one finger | Pan the view (also when the drag starts on a node) |
| Two fingers | Zoom in and out |
| Tap the small circle next to a node | Collapse or expand the branch |
All other commands are available through the toolbar: add child and sibling nodes, edit text, delete, undo and redo, zoom, grid, import, export and templates.
Layout on tablets
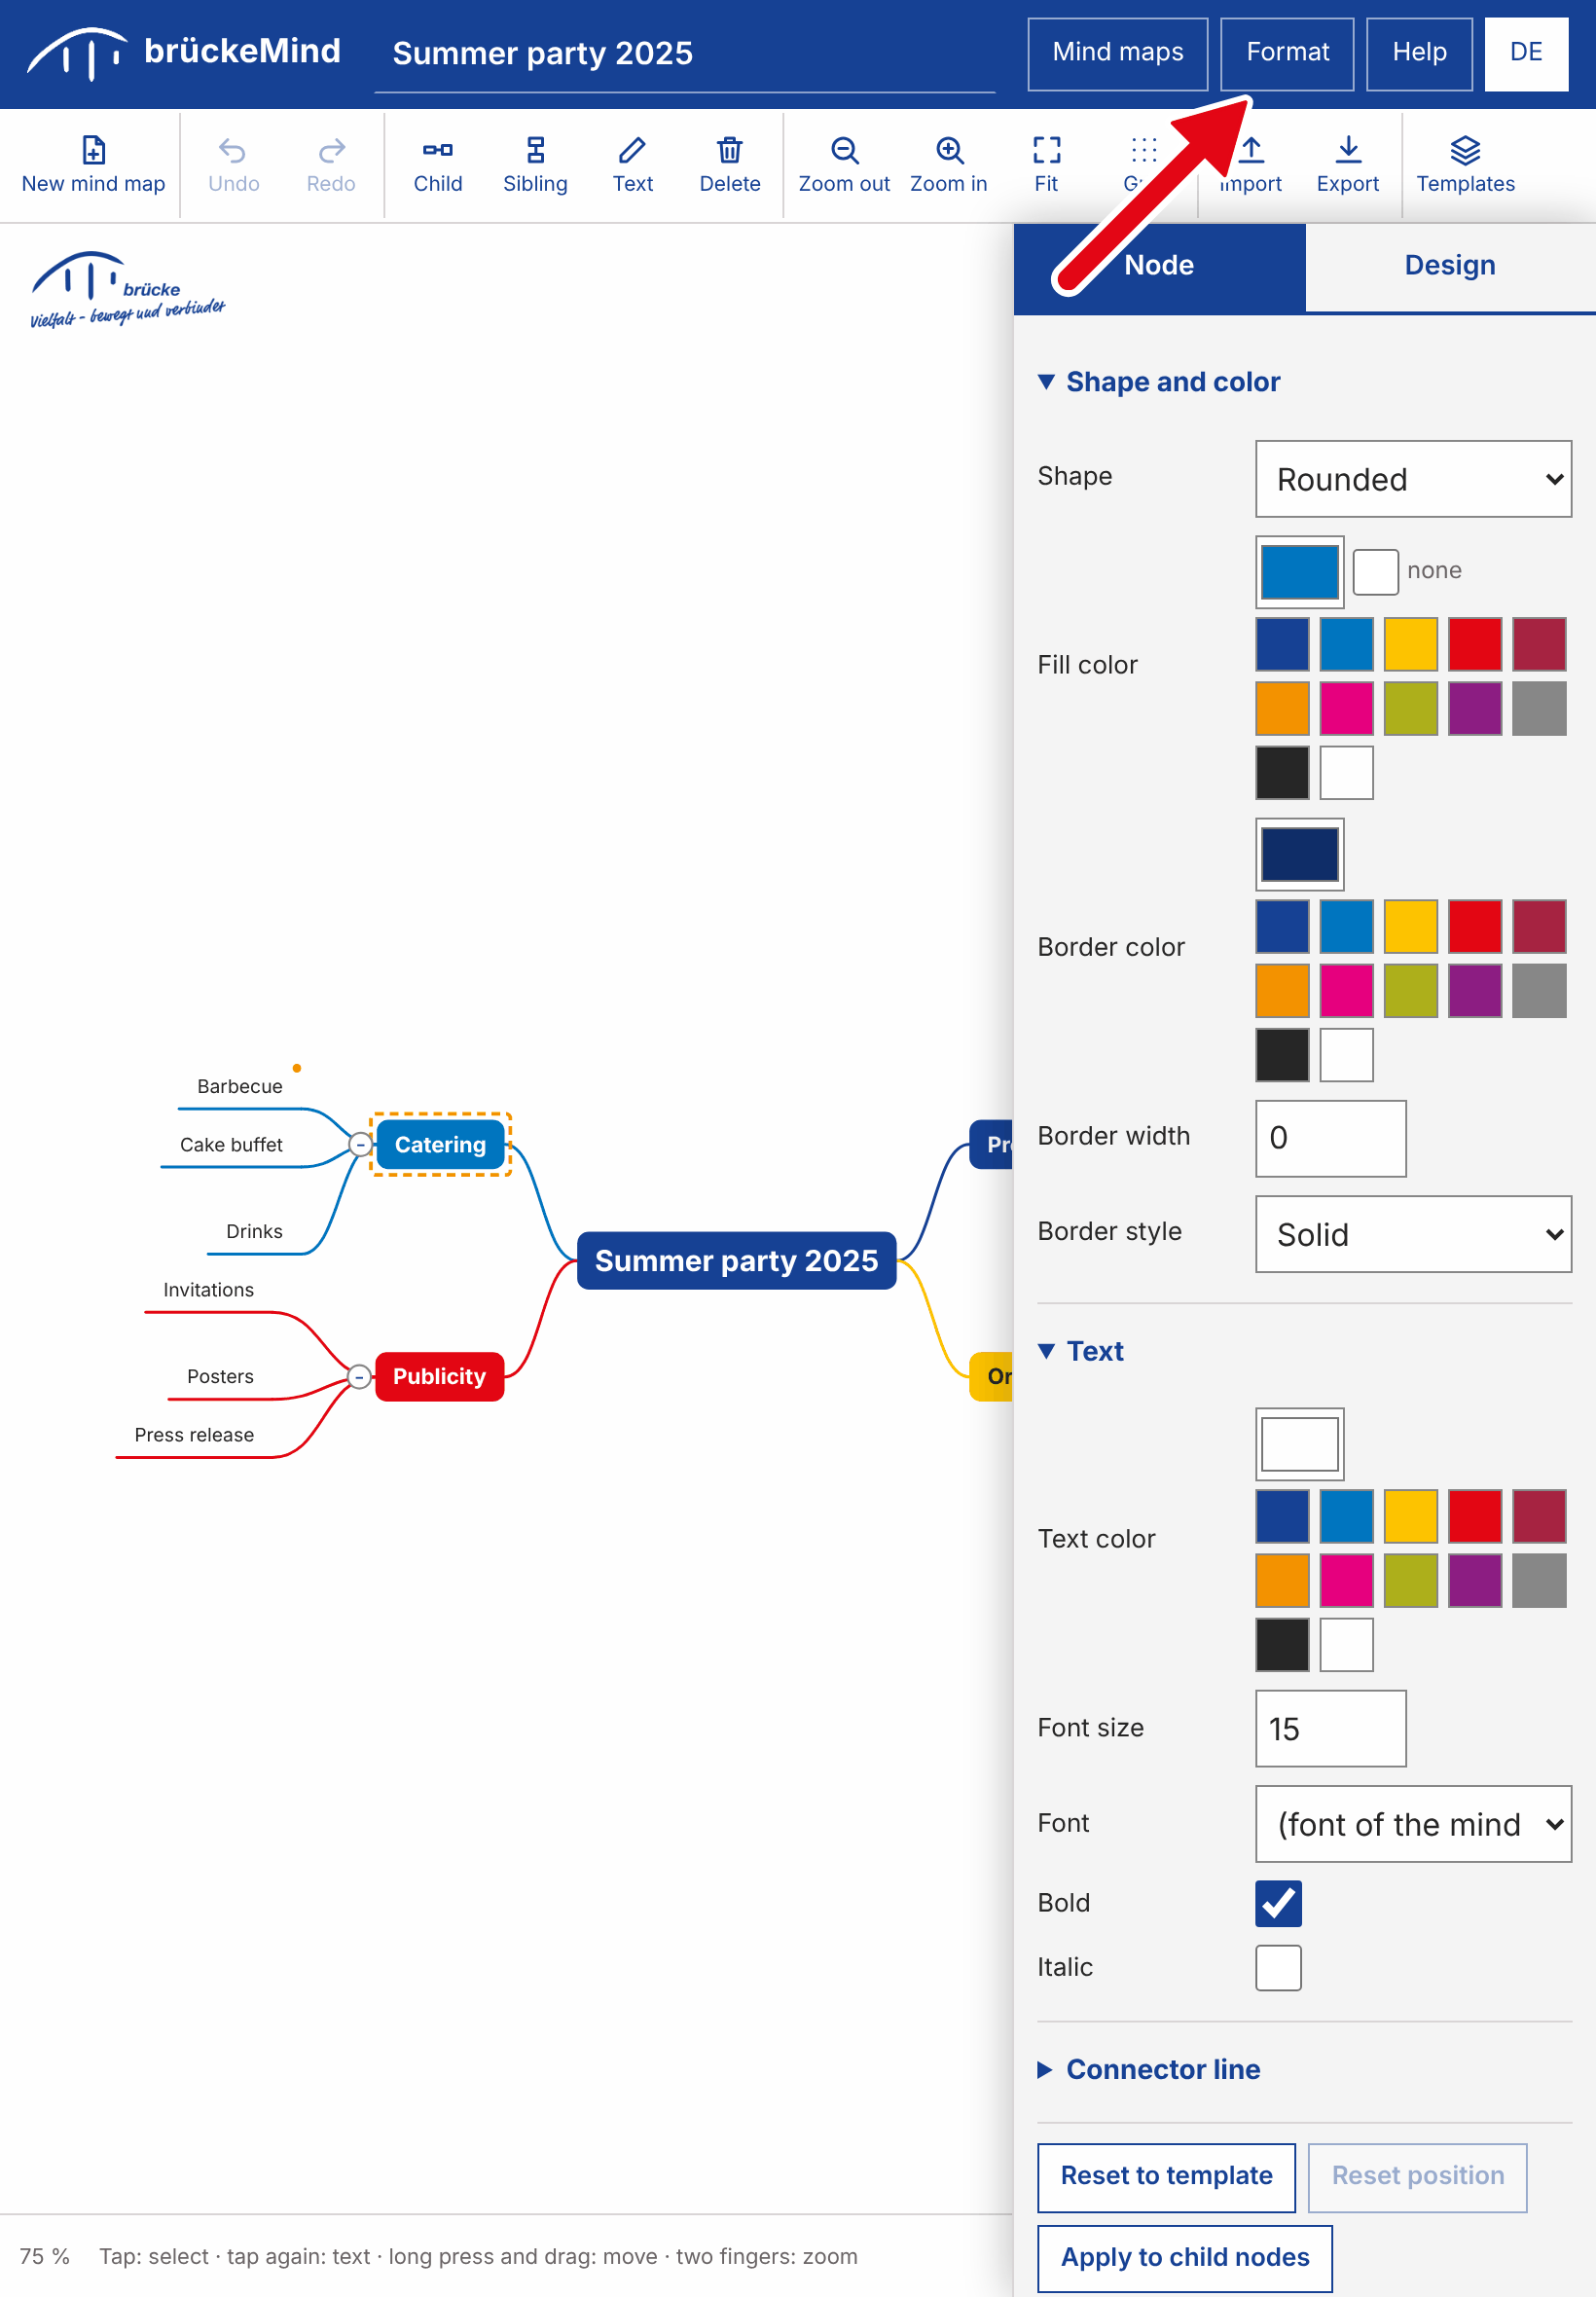
On screens up to 1024 pixels wide, for example a tablet held upright, the mind map list and the format panel are hidden at first and slide over the canvas when opened with Mind maps or Format in the header. The toolbar becomes compact. On wider screens the layout is the same as on a desktop computer. On touch screens all buttons and form fields are enlarged.
13. Data storage and privacy
Mind maps, your templates and the settings are stored in the local storage of the browser. They never leave the computer. Please note:
- The storage belongs to one browser profile. Another browser or computer does not see the data.
- Clearing the browser data deletes the mind maps. Export important mind maps as ZIP files.
- The storage is limited (about 5 MB in most browsers). Large embedded images use it up quickly; the application shows a message when saving fails.
14. Known limitations
- Nodes that were placed by hand can overlap other nodes; the automatic arrangement does not make room for them.
- Only one node can be selected at a time.
- A mind map is printed on one page; it is not split across several pages.
- The application is designed for desktop computers and tablets; phone screens are too small for comfortable use.
- Copy, cut and paste of branches and moving a node among its siblings with the keyboard have no touch equivalent yet.
- ZIP files compressed by other programs need a browser that supports
DecompressionStream(all current browsers do).
15. Developer notes
The code uses classic scripts that share the global namespace BM. ES modules are avoided
on purpose because they do not load from the file system.
Every file starts with a comment that explains its purpose, and every function has a short header
comment. Modules register a start-up function in BM.inits and talk to each other through
the event bus BM.bus; texts are translated with BM.t('key').
After every change of a file of the application run
python3 tools/update-service-worker.py; it writes the file list and a new version into
sw.js, otherwise installed offline apps keep the old files.
| File | Responsibility |
|---|---|
index.html, css/app.css | Page structure and styles |
js/version.js, js/util.js | Namespace, version, helpers and event bus |
js/lang/de.js, js/lang/en.js | German and English texts of the user interface |
js/i18n.js, js/icons.js | Translation function and inline SVG icons |
js/template.js | Template model, defaults and style resolution |
js/color.js, js/color-system.js | Colour arithmetic and the two colour systems |
js/model.js, js/storage.js | Mind map data model and local storage |
js/layout-measure.js | Measuring nodes: font, word wrapping, size of text and shape |
js/layout.js | Automatic layout with growth directions, grid snapping and manual positions |
js/render.js | SVG drawing of nodes, shapes and connectors |
js/render-export.js | Standalone picture of a map (SVG, PNG, JPEG) with fixed elements |
js/editor.js | Editor core: open map, rendering, selection, undo/redo |
js/editor-view.js | Zoom, pan and fit |
js/editor-commands.js | Commands that change the map: add, delete, move, clipboard, grid |
js/editor-text.js | Text field for editing a node |
js/editor-keyboard.js | Keyboard shortcuts and arrow key navigation |
js/editor-pointer.js | Mouse and touch handling |
js/ui.js | Toolbar, panel tabs, sections and mind map list |
js/dialogs.js, js/shortcuts.js | Dialogs, messages and the keyboard command overview |
js/shell.js | Header, resizable side columns, core toolbar entries, event wiring |
js/forms.js, js/format-panel.js | Form builder and the Node tab |
js/template-form.js | Form that edits a template |
js/template-ui.js | Design tab and template manager |
js/fixed-layer.js | Overlay that shows fixed elements (logo, text, date) on the canvas |
js/zip.js, js/opml.js | ZIP reader/writer, OPML and layout.xml |
js/pdf.js, js/print.js | PDF writer, page format, printing and PDF export |
js/io-ui.js | Import and export commands |
js/pwa.js, sw.js, manifest.json | Offline app: registration and updates, the service worker that stores all files, app name and icons |
js/app.js | Start-up and mind map management |
templates/base-template.js | The base template |
Branch model
main holds releases, dev is the integration branch. Each version is developed
on version/<x.y.z>, which branches off dev; features are developed on
feature/<x.y.z>-<name> branches and merged into the version branch.